
DevOps managers and engineers across large and medium enterprises are gradually adopting Argo CD. And the interest in installing and implementing open source continuous delivery solutions is constantly growing. One can install Argo CD in different ways. This article will showcase how to install Argo CDs into Kubernetes using manifest and HELM charts.
I will discuss the following sections
- Section-1: Installing Argo CD using manifest
- Section-2: Installing Argo CD using HELM chart
Section1: Installing Argo CD using manifest
Prerequisites
For Argo installation, please take care of the following criteria or prerequisites:
- Use Ubuntu machine
- Install Docker
- Install kubectl
- Install Minikube
We have provided instructions for setting up Docker and Minikube, but if you are already prepared for the installation, please skip Step1 and Step2.
Steps for installing Argo CD
- Setup Docker
- Install minikube
- Install Argo CD into minikube using manifest
- Change user credentials in the Argo UI
Step1: Setup Docker
First, one needs to set up Docker to provide users the permissions to access containers for Argo CD installation. I have used Docker 20.10.14 on my machine ( any latest version of Docker should be fine).
					sai@opsmx-hyd-l-194:~/demo$ docker version
Client: Docker Engine - Community
 Version:           20.10.14
 API version:       1.41
 Go version:        go1.16.15
 Git commit:        a224086
 Built:             Thu Mar 24 01:48:02 2022
 OS/Arch:           linux/amd64
 Context:           default
 Experimental:      true
In case you are facing any issue (like mentioned below) after running this command, check if the user you currently logged in to is available in the docker group or not. You can use the subsequent commands.
Got permission denied while trying to connect to the Docker daemon socket at unix:///var/run/docker.sock: Get "http://%2Fvar%2Frun%2Fdocker.sock/v1.24/version": dial unix /var/run/docker.sock: connect: permission denied
Id <username>
To know your username run the below command.
whoami
If you are not in Docker group run the below command to add Docker group.
sudo groupadd docker
Run the below command to add the user to the added docker group.
sudo usermod -a -G docker <userName>
If you are facing issues again while running the Docker version command run the below command to provide read, write and execute permissions to docker.sock.
sudo chmod 777 /var/run/docker.sock
This brings to the end of the Docker setup. Now we will install Minikube.
Step2: Install minikube
To download minikube to your local machine, run the following command.
# curl -LO https://storage.googleapis.com/minikube/releases/latest/minikube-linux-amd64
To install minikube, run the following command.
# sudo install minikube-linux-amd64 /usr/local/bin/minikube
After the installation of minikube is completed, you can start a cluster to install Argo CD. Run the following command to start a new cluster.
# minikube start
(Optional) If you want to check the health status of the cluster, run the following command.
# minikube status
Step3: Install Argo CD into minikube using manifest
We will start to Install Argo CD applications by creating a namespace in the minikube first.
Run the command to create a namespace (we have used argocd) in the minikube cluster.
kubectl create namespace argocd
Install argo to the argocd created namespace.
kubectl apply -n argocd -f https://raw.githubusercontent.com/argoproj/argo-cd/stable/manifests/install.yaml
Run the below commands to change the argocd-server service type to NodePort. This is required to access the Argo CD service using the node port.
kubectl patch svc argocd-server -n argocd -p '{"spec": {"type": "NodePort"}}'
To access the Argo CD application from the browser, run the below command to get IP address of the argocd-server service.
					minikube service argocd-server -n argocd -url
http://192.168.49.2:31291
http://192.168.49.2:31594
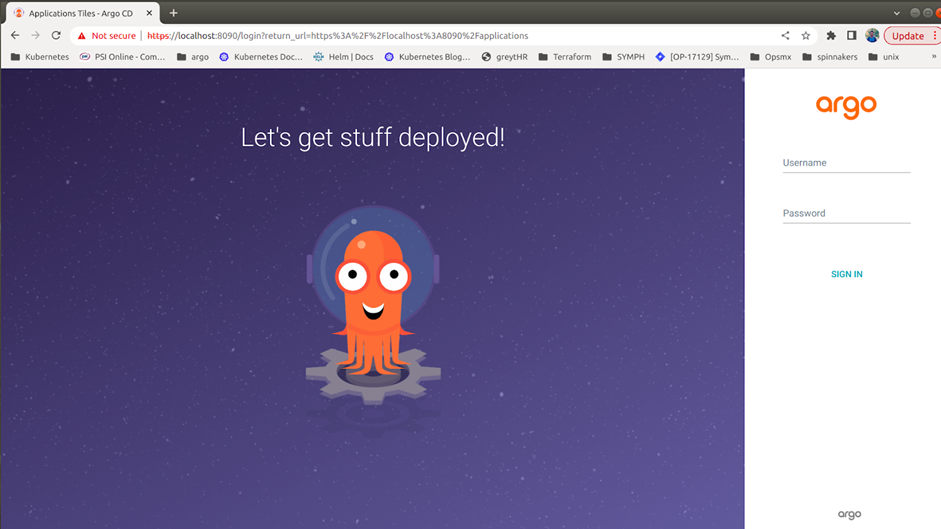
After running this command, you will get an IP address, and access the application in the browser using that IP address. You can access the Argo CD from the browser using ‘admin’ as the default username.
Get the password of the Argo CD application, for ‘admin’ username, by executing the below command.
kubectl -n argocd get secret argocd-initial-admin-secret -o jsonpath='{.data.password}' | base64 -d
You can access Argo using the temporary credentials. To secure your application with a new password, you can change the password of the ‘admin’ username in the following way.
console.log( 'Code is Poetry' );
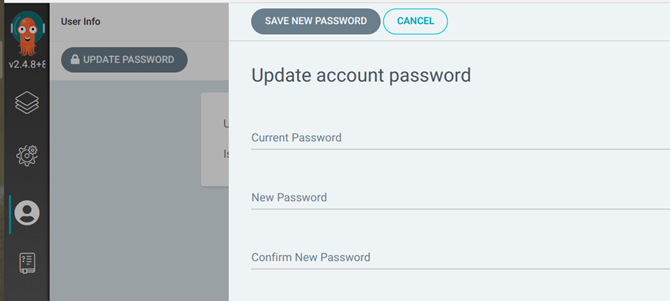
Step4: Change user credentials in the Argo UI
You can log in to the Argo screen using the IP as mentioned above and then use the credentials for ‘admin’ users and a temporary password from the CLI.
You can then go to the user info tab in the left-hand side panel to update the password. Refer to the below screenshots to change your password.
Login to Argo through the UI

Go to userinfo section in the left side panel.
Click on update password to change the password.

Section2: Installing Argo CD into Kubernetes using HELM Charts
This section will teach how to install Argo CDs using HELM charts.
Prerequisites
The two essential items you need to ensure before installing Argo are
- Minikube installed
- Kubectl installed
- Helm installed
Steps for installing Argo using HELM
Step1: Install Argo CD using HELM
Step2: Check status
Step3: Uninstall Argo using HELM
Step1: Install Argo CD using HELM
At first you need to connect to the clusters in minikube or Kubernetes or any managed k8s. And then follow the below steps.
Clone the public repo to pull the source of Argo CD from Github to the local (we have installed minikube to the local machine).
Link to Argo CD source code: https://github.com/argoproj/argo-helm.git
git clone https://github.com/argoproj/argo-helm.git
Change the directory or the folder where you need to install Argo using helm charts
cd argo-helm/charts/argo-cd/
Run the below command to create a namepsace (we have named myargo) in the folder for argo installation
kubectl create ns myargo
You can modify any custom values in values.yaml. But for now we will process using default values.yaml
Update the dependencies in the chart by executing the below command.
helm dependency up
Install argo using helm command
helm install myargo . -f values.yaml -n myargo
Note if you come across the following error, please follow the subsequent steps.
Error: rendered manifests contain a resource that already exists. Unable to continue with install: CustomResourceDefinition "applications.argoproj.io" in namespace "" exists and cannot be imported into the current release: invalid ownership metadata; label validation error: missing key "app.kubernetes.io/managed-by": must be set to "Helm"; annotation validation error: missing key "meta.helm.sh/release-name": must be set to "myargo"; annotation validation error: missing key "meta.helm.sh/release-namespace": must be set to "myargo"
If you face the above issues with CRDs, then comment crds install value to ‘false’ in values.yaml. Refer to the below command.
					crds:
  # -- Install and upgrade CRDs
  install: false
Step2: Check the status of Argo CD installation
Once the installation is complete, let’s see the pods running
kubectl get po -n myargo
After ensuring the pods are running, then port-forward the Argo cd service to access the service from the browser.
kubectl port-forward service/myargo-argocd-server 8090:80 -n myargo
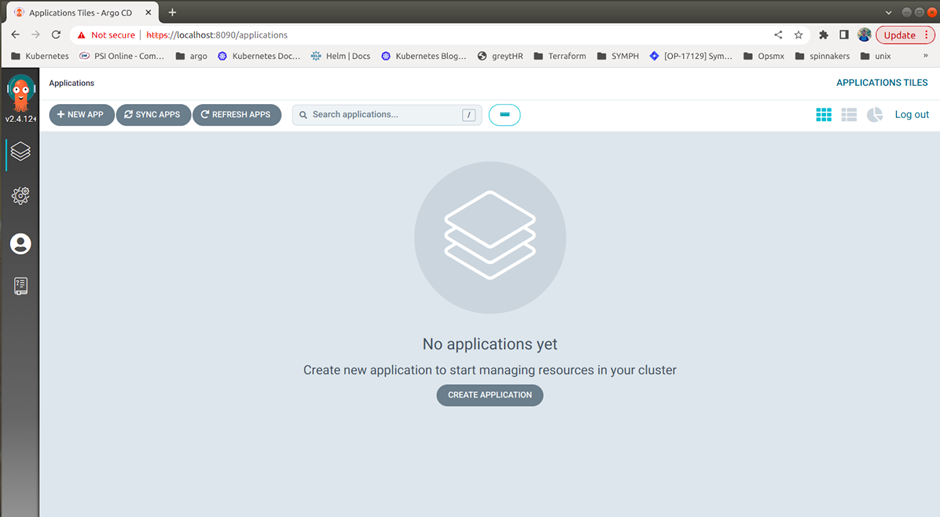
You can now access the Argo CD UI from your browser by typing the following URL. http://localhost:8090
Very similar to the Argo CD installation using the manifest section, one has to get the password for the ‘admin’ password using the following command.
Get the password from the new terminal using the below command.
kubectl -n myargo get secret argocd-initial-admin-secret -o jsonpath='{.data.password}' | base64 -d
Login to Argo CD UI using the username: admin and password.
Step3: Uninstall Argocd using HELM
You can simply follow the steps if you want to uninstall Argocd from your local machine.
First, list the release name in your namespace
					helm list  -n myargo
NAME  NAMESPACE REVISION STATUS      CHART      APP VERSION
myargo  myargo   1  	   deployed  argo-cd-5.5.6	v2.4.12
Uninstall Argocd using the release name and namespace, using helm.
helm uninstall myargo -n myargo
Final Thoughts
If you want to install Argo CD to a public cloud (AWS/GCP/Azure) for your organisational needs, you can complete its installation using the same commands. Read the next article on how to configure private Git repo in Argo CD to start GitOps style deployment in K8S.
If you want to start Argo CD without any hassle of application configurations or security setup, read more about OpsMx Intelligent Software Delivery (ISD) for Argo. Free trial for ISD for Argo is available here.
OpsMx also provides Argo Center of Excellence (COE) for enterprises needing expert services or consultation on Argo CD and Argo Rollout implementation to expedite their GitOps journey.

About OpsMx
Founded with the vision of “delivering software without human intervention,” OpsMx enables customers to transform and automate their software delivery processes. OpsMx builds on open-source Spinnaker and Argo with services and software that helps DevOps teams SHIP BETTER SOFTWARE FASTER.
0 Comments