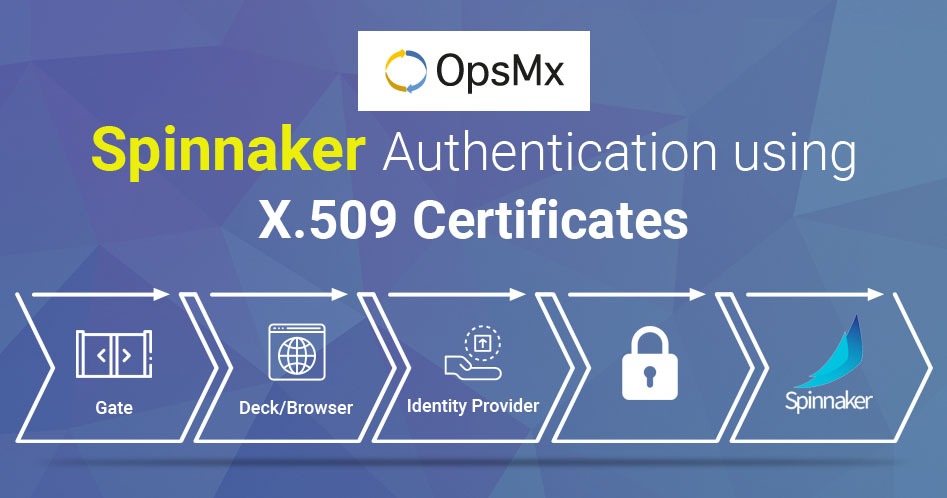
The authentication mechanism in Spinnaker supports a variety of different login sources. There are three basic systems involved with Spinnaker’s authentication workflow: your identity provider (IDP), Gate, and Deck. x509 client certificates can be used as an identity provider.
What is x509?
x509 is a standard defining the format of public-key certificates. An x509 certificate contains a public key and an identity (a hostname, or an organization, or an individual), and is either signed by a certificate authority or self-signed. When a certificate is signed by a trusted certificate authority(CA), or validated by other means, someone holding that certificate can rely on the public key it contains to establish secure communications with another party or validate documents digitally signed by the corresponding private key.
Requirements:
- Before starting we assume that a Spinnaker with the required version is already installed and it is up and running. [Can Refer to https://www.spinnaker.io/setup/install/halyard/ for Spinnaker Installation steps]
- Need to Enable SSL Configuration for the Spinnaker.
Setting up SSL Configuration for Spinnaker
Generate key and self-signed certificates:
We can use OpenSSL to generate a Certificate Authority (CA) key and a server certificate.
Use the steps below to create a certificate authority. (If you’re using an external CA, skip to the next section.)
It will produce the following items:
- ca.key: a pem-formatted private key, which will have a passphrase.
- ca.crt: a pem-formatted certificate, which (with the private key) acts as a self-signed Certificate Authority.
Steps:
- Create the CA key. The command below references the passphrase environment variable used to encrypt the key ca.key.
openssl genrsa -des3 -out ca.key -passout pass: 4096 - Self-sign the CA certificate. This command below references the passphrase environment variable used to decrypt the key – ca.key.
- Create the CA key. The command below references the passphrase environment variable used to encrypt the key ca.key.
openssl req -new -x509 -days 365 -key ca.key -out ca.crt -passin pass:
Spinnaker Deck and Gate Certificates:
If there are different DNS names for Deck and Gate endpoints, then either create a certificate with a CN and/or SAN that covers both DNS names or can create two certificates. This document covers creating these certificates, signed by the self-signed CA cert created above:
- Create a server key for Deck. The command below references the passphrase environment variable used to encrypt the key deck.key.
openssl genrsa -des3 -out deck.key -passout pass: 4096 - Generate a certificate signing request (CSR) for Deck. Specify localhost or Deck’s eventual fully-qualified domain name (FQDN) as the Common Name (CN).This command below references the passphrase environment variable used to decrypt the key deck.key.
openssl req -new -key deck.key -out deck.csr -passin pass: - Use the CA to sign the server’s request and create the Deck server certificate[If using an external CA, they will do this].The command below references the passphrase environment variable used to decrypt the key ca.key.
openssl x509 -req -days 365 -in deck.csr -CA ca.crt -CAkey ca.key -CAcreateserial -out deck.crt -passin pass: - Create a server key for Gate. The command below references the passphrase environment variable used to encrypt the key gate.key. Keep this file safe!
openssl genrsa -des3 -out gate.key -passout pass: 4096 - Generate a certificate signing request for Gate. Specify localhost or Gate’s eventual fully-qualified domain name (FQDN) as the Common Name (CN). The command below references the passphrase environment variable used to decrypt the key gate.key.
openssl req -new -key gate.key -out gate.csr -passin pass: - Use the CA to sign the server’s request and create the Gate server certificate[If using an external CA, they will do this]. The command below references the passphrase environment variable used to decrypt the key ca.key.
openssl x509 -req -days 365 -in gate.csr -CA ca.crt -CAkey ca.key -CAcreateserial -out gate.crt -passin pass: - Convert the Gate server certificate into a PKCS12 (p12) file, which is importable into a Java Keystore (JKS). This command below references the passphrase environment variable used to decrypt the key gate.key, and then for an import/export password to use to encrypt the p12 file.
openssl pkcs12 -export -clcerts -in gate.crt -inkey gate.key -out gate.p12 -name gate -passin pass: -password pass: - Create a new Java Keystore (JKS) containing a p12-formatted Gate server certificate. Because Gate assumes that the Keystore password and the password for the key in the Keystore are the same, we must provide both via the command line. This will prompt for the import/export password used to encrypt the p12 file.
keytool -importkeystore -srckeystore gate.p12 -srcstoretype pkcs12 -srcalias gate -destkeystore gate.jks -destalias gate -deststoretype pkcs12 -deststorepass -destkeypass -srcstorepass - Import the CA certificate into the Java Keystore. This will prompt for a password to encrypt the Keystore file.
keytool -importcert -keystore gate.jks -alias ca -file ca.crt -storepass -noprompt - Verify the Java Keystore contains the correct contents. It should contain two entries of the gate and ca.
keytool -list -keystore gate.jks -storepass
Configure SSL for Spinnaker services – Gate and Deck:
With the above certificates and keys in hand, we can use Halyard to set up SSL for Gate and Deck.
Gate:
hal config security api ssl edit --key-alias gate —keystore <KEYSTORE_PATH> --keystore-password --keystore-type jks —truststore <KEYSTORE_PATH> --truststore-password --truststore-type jks
hal config security api ssl enable
Deck:
hal config security ui ssl edit --ssl-certificate-file --ssl-certificate-key-file --ssl-certificate-passphrase
hal config security ui ssl enable
Note: Once the SSL Configuration is done override the base URL for the gate and deck with the “HTTPS”
hal config security ui edit --override-base-url https://:9000
hal config security api edit --override-base-url https://:8084
hal config security authn edit --pre-established-redirect-uri 8084/login
Deploy Spinnaker and verify the SSL Setup:
hal deploy apply
Client certificate Generation:
Using the CA Certificate generated above we can generate a Client certificate using OpenSSL.
- Create the client key.
openssl genrsa -des3 -out client.key 4096 - Generate a certificate signing request for the server.
openssl req -new -key client.key -out client.csr - Use the CA to sign the server’s request [[If using an external CA, they will do this].
openssl x509 -req -days 365 -in client.csr -CA ca.crt -CAkey ca.key -CAcreateserial -out client.crt - Format the client certificate into browser importable form.
openssl pkcs12 -export -clcerts -in client.crt -inkey client.key -out client.p12
Enable x509 in Spinnaker:
hal config security api ssl edit --client-auth # Set to WANT or NEED
There are two states for client-auth – WANT, and NEED.
Set client-auth to WANT to use a certificate if available. SSL connections will succeed even if the client doesn’t provide a certificate. This is useful if you enable x509 with another authentication method like OAuth, LDAP, SAML – when a certificate is not provided, users can still authenticate with one of these methods.
Set client-auth to NEED if x509 is the sole authentication method, or if you want to ensure the certificate is provided AND another authentication mechanism is used.
hal config security authn x509 enable
Once the x509 is enabled, users need to import the client certificate into their browsers and access the Deck URL. Once the Deck is accessed it will ask to select his client certificate, once this is done the user will be authenticated to access the spinnaker.

Enable X.509 certificate for Spinnaker
Note: Once the x509 authentication is enabled, the gate pod won’t be coming up saying that the health check is getting failed, So, we need to change the way the health check is being done by replacing the existing wget with netstat.
To do this, edit the gate.yml file (add it if not present) with the below contents under the path .hal/default/service-settings/ of the halyard pod.
kubernetes:
useExecHealthCheck: true
customHealthCheckExecCommands: ["netstat", "-anl", "|" ,"grep" ,"8084"]
healthEndpoint:
Run hal deploy apply.
This time the Gate pod would be up and running without any issues.
About OpsMx
Founded with the vision of “delivering software without human intervention,” OpsMx enables customers to transform and automate their software delivery processes. OpsMx builds on open-source Spinnaker and Argo with services and software that helps DevOps teams SHIP BETTER SOFTWARE FASTER.


0 Comments
Trackbacks/Pingbacks