To leverage the potential opportunities for managing a pipeline on spinnaker through the ease of a messenger platform, we will need to configure SlackOps. It is essential that a Slackbot is configured first before it can perform the assigned activities.
What are Slackbots?
A Slackbot is a type of Slack App designed to interact with users via conversation. It can access the same range of APIs and do all of the magical things that a Slack App can do. The slack bot can take a name, a face, and a personality, and encourage users to talk to it.
The Slackbot can send DMs, it can be mentioned by users, it can post messages or upload files, and it can be invited to channels – or kicked out.
A little background on SlackOps for Spinnaker
Spinnaker supports Slack notifications natively. These notifications provide updates to users about the situation in your pipeline. For example, we can configure it to notify your SREs about a scheduled deployment. This gives them a heads-up that something is changing, which can make a big difference when troubleshooting support issues from our users.
Why use SlackOps on Spinnaker?
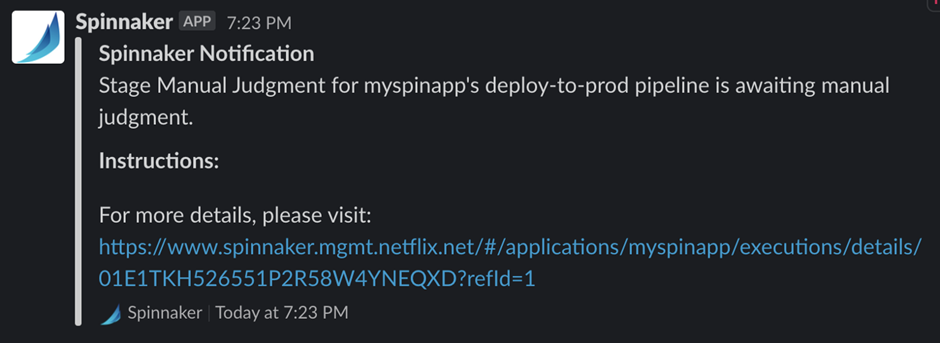
These notifications are very helpful to let you know what’s going on with your pipelines. For example, at Netflix, the Spinnaker team itself uses Slack notifications to alert team members who are on-call that a deployment is happening to a service in production, and whether it was completed successfully. This gives them a heads-up that something is changing, which can make a big difference when troubleshooting support issues from our users. The screenshot below shows examples of these kinds of notifications:
The flipside of these notifications
Though timely notifications are helpful in many ways, the only problem is that you can’t really do anything about them from Slack. One has to navigate to the Spinnaker portal and navigate through multiple settings and options and filters to see more detail or take any action. As heavy users of Slack who use a bunch of bots and app integrations to do things ranging from opening support tickets to paging people for production incidents, developers and Engineers have been wanting to add that kind of capability to Spinnaker itself for a while.
For example, when a deployment is gated by a “manual judgment”, engineers can get a notification with details about the version that’s about to be deployed and where.
As you can see, you get a link to the UI where you can go and approve the manual judgment, but you can’t take action directly from Slack.
Existing manual judgment notifications are useful, but you can’t take action from Slack Engineers and developers. If able to react by approving or rejecting a notification directly from Slack, it will save a lot of time and toil.
Spinnaker Custom Stages to the rescue
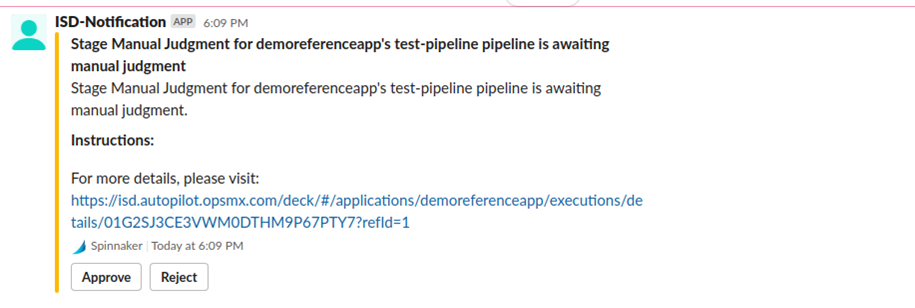
Using SlackOps we can achieve interactive notifications which we will be able to Approve/Reject Manual judgment constraints from Slack.
With proper configuration, the bland notification could be made to further carry out actions decided by the stakeholder. For example, before deployment, the notification can have an approve or reject button. This will quickly notify the user and encourage the user to take due action.
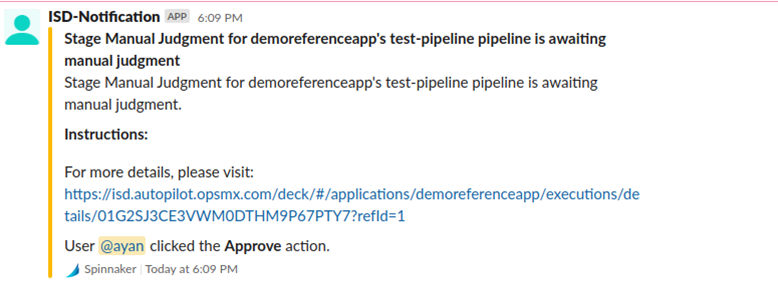
And further respective stakeholders can also be notified of the manual action taken on the pipeline as shown below.
A step-by-step guide to incorporating SlackOps on Spinnaker?
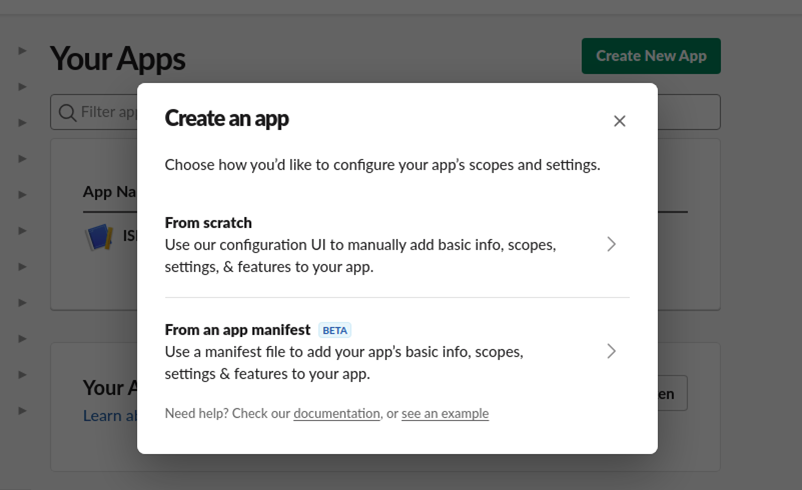
In order to do so, we have to create a Slack app: There are 2 ways of creating a Slack app
- From Scratch
- From an app manifest
In this blog we will be using the “From Scratch” method to create an application in slack.
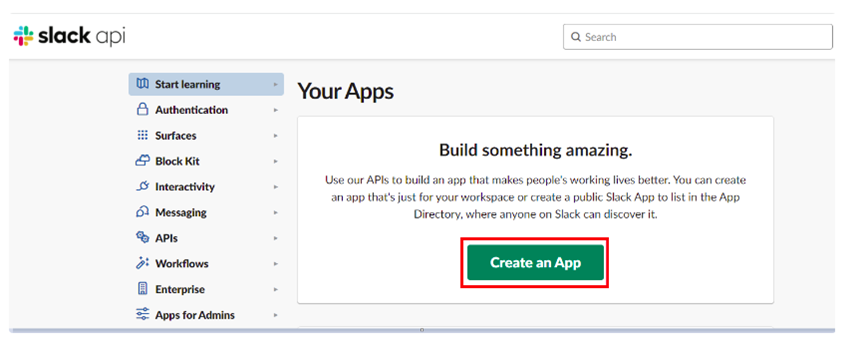
Please visit the URL https://api.slack.com/apps
Click “Create an App”
2. Click on “From Scratch”:
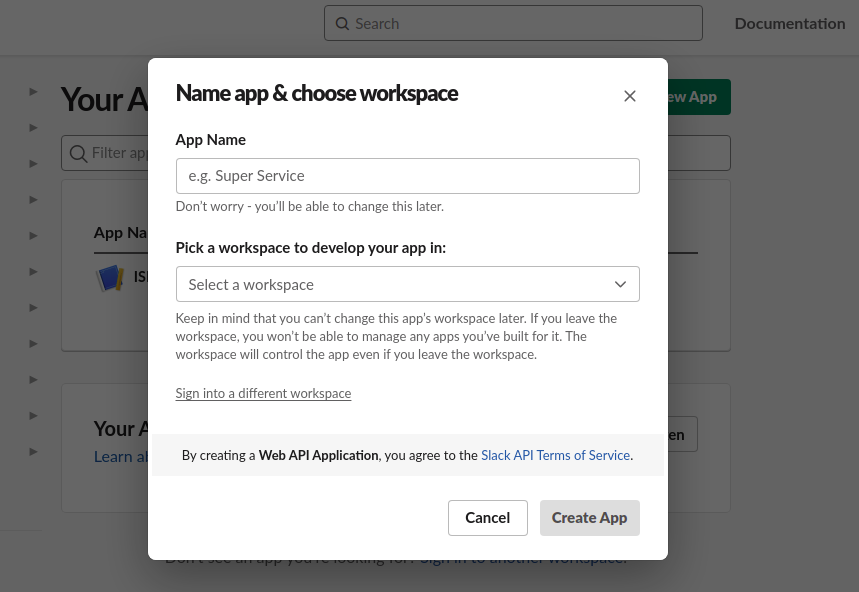
3. Type your “App Name” and “Pick a workspace to develop your app in” from the dropdown and then click “Create App”.
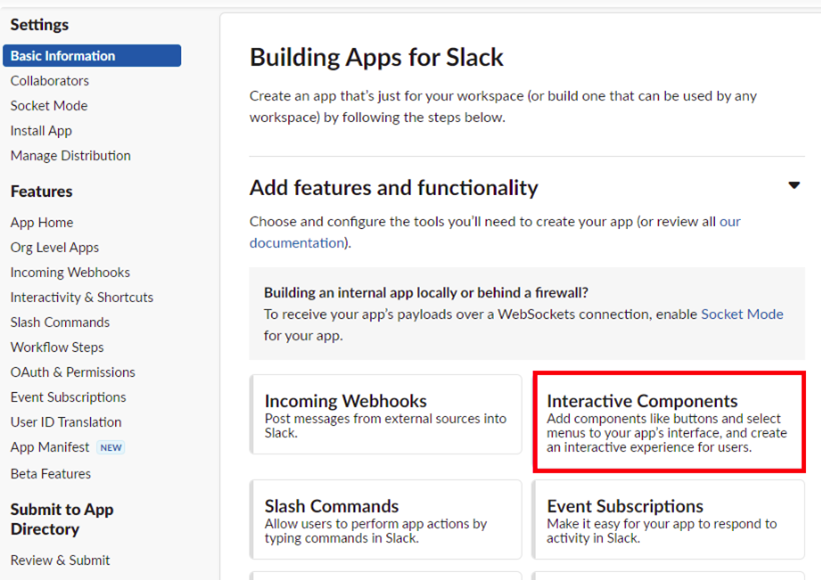
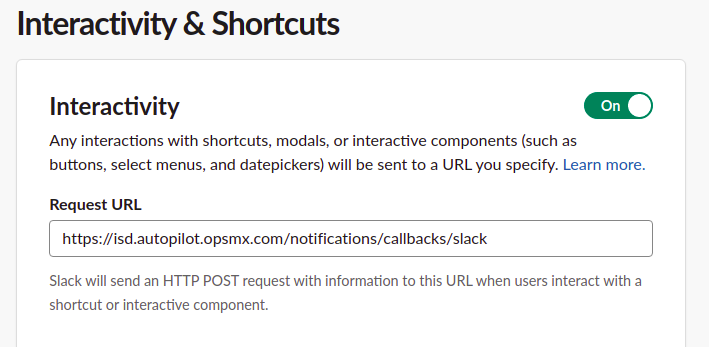
4. Click on “Interactive Components” to Configure Spinnaker gate Callback API Endpoint in Slack.
5. “Turn on” interactivity and enter the Spinnaker gate URL in the Request URL column and then click “Save Changes”. For Example: (https://<your-domain-name>/notifications/callbacks/slack).
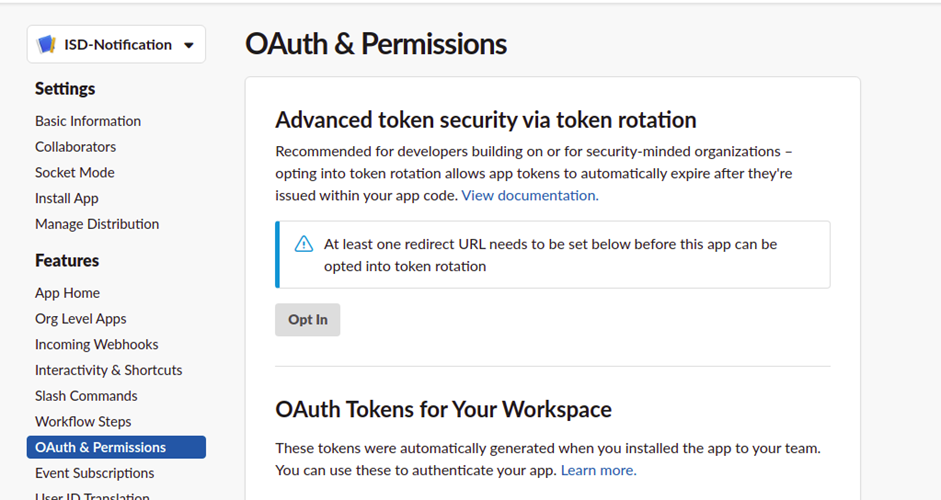
6. Click “OAuth & Permissions” from the navigation menu.
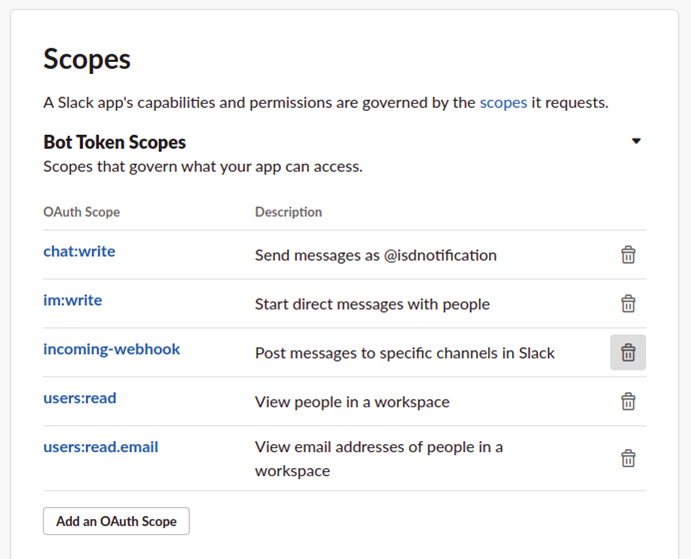
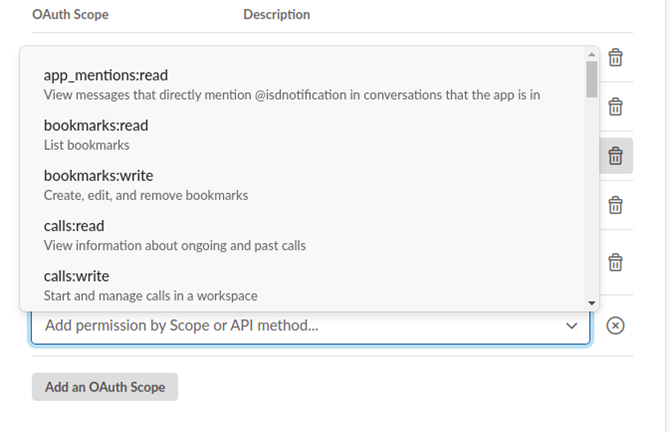
7. Click on “Add an OAuth Scope”.
8. For bot token select “users:read, users:read.email, chat:write” from the drop-down
Your application is now ready to be installed in the workspace and added to Slack channels.
The next Step would be to Install the slack app that we configured above into our slack workspace and then add it to our slack channel.
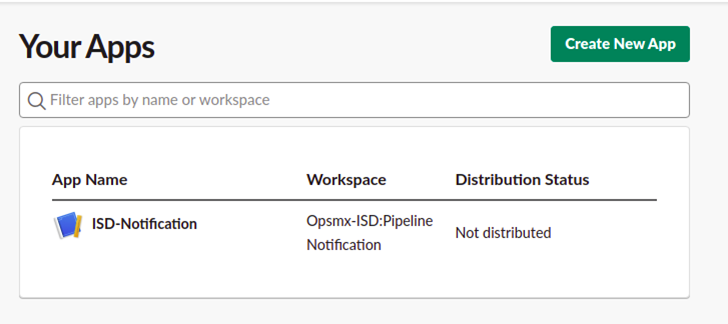
We will again go to https://api.slack.com/apps, and follow the below steps:
1. Click your application from the list you will get:
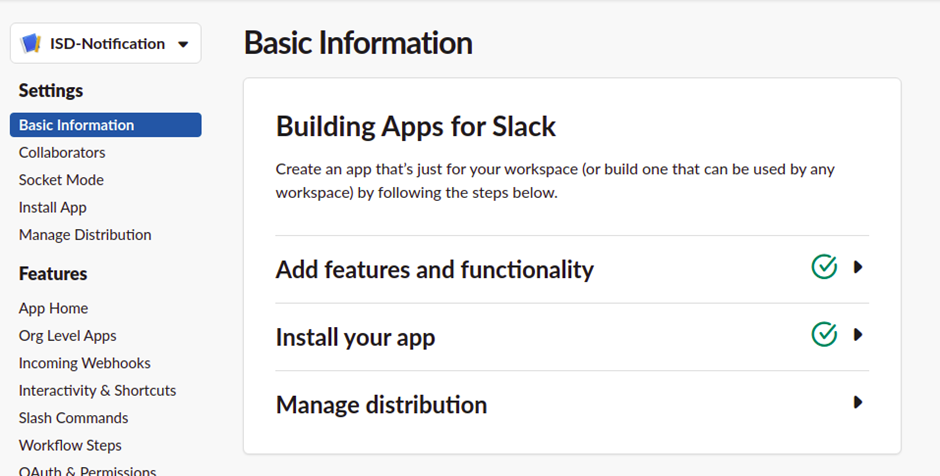
2. The below screen will appear and you can select your application from the drop-down in the top left-hand side corner. Click “Basic Information” and then click “Install your app” to install your application into the workspace.
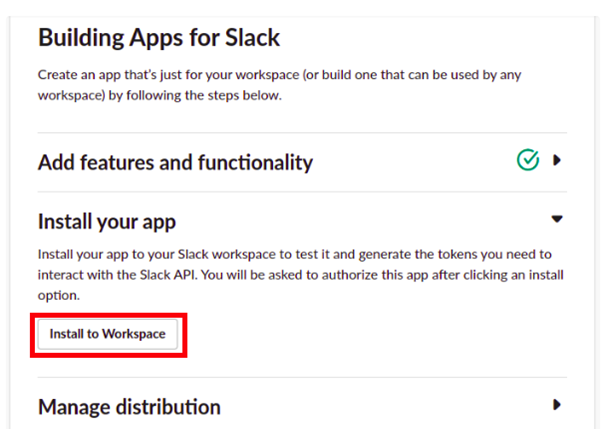
3. Click “Install to Workspace“.
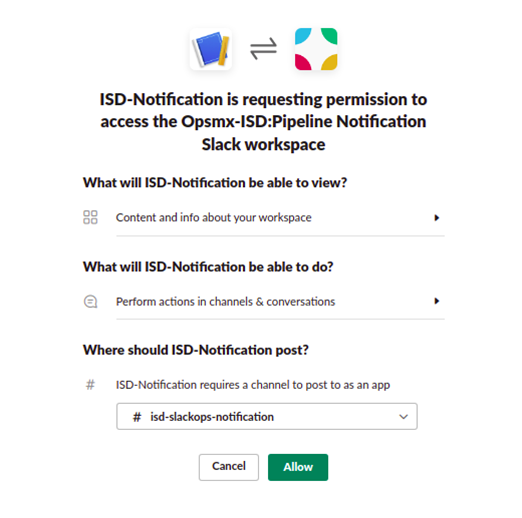
4. Select your “Slack Channel” from the drop-down and Click “Allow”.
Your application is installed now in the workspace and you need to integrate your application into Slack channels by following the below steps.
Next, we complete Integration to Slack Channel:
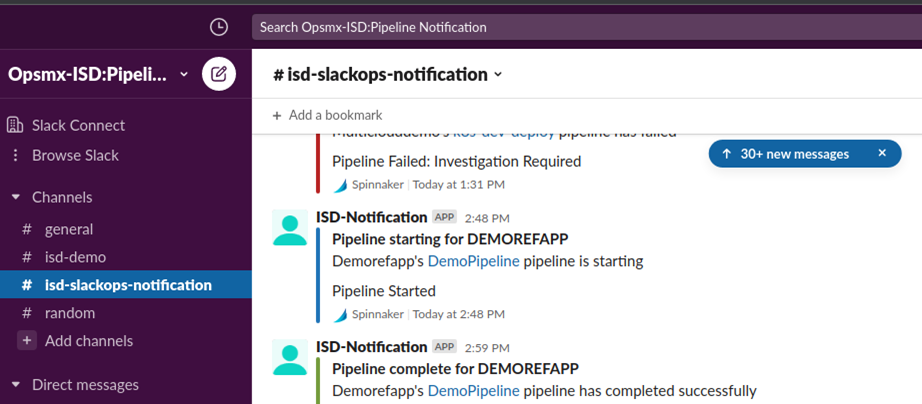
1. Go to your Slack application and Click your “Channel Name” from the channel list as shown in the below image. For Example the “#isd-slackops-notification” channel name is selected in the below steps.
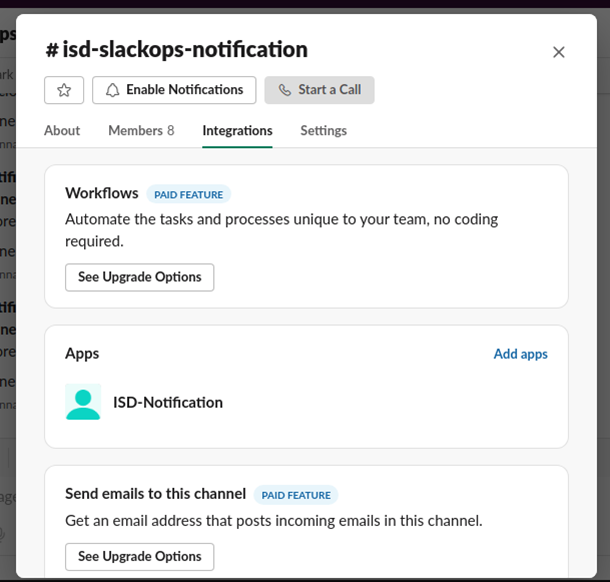
2. Select your channel “#isd-slackops-notification” and then click on the channel name at the top of your screen which has a down arrow on its side, you will get the window below, where you select the “Integrations” tab.
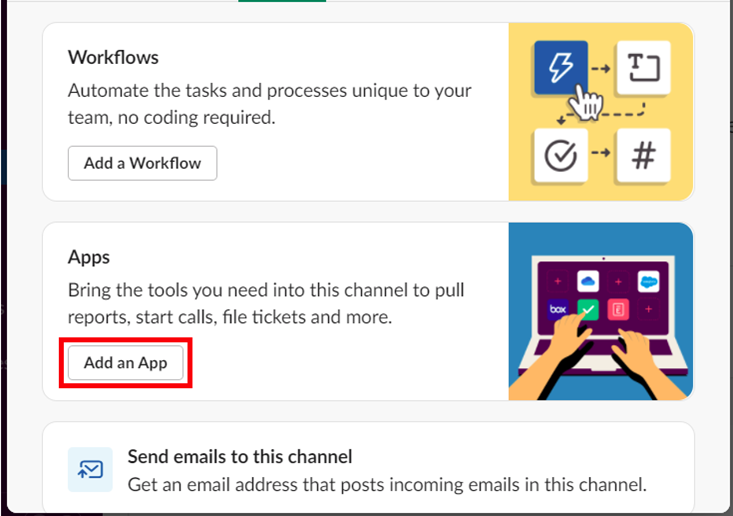
3. Click the “Add an App” button from the integration window.
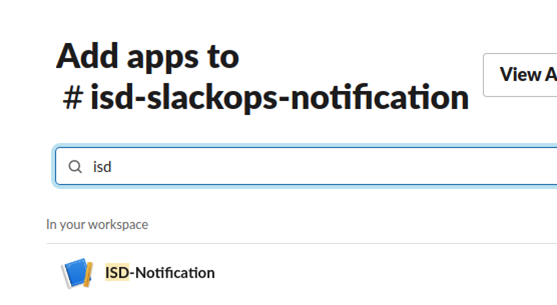
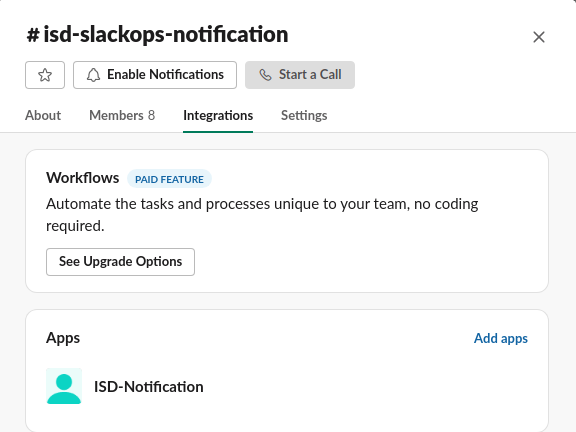
4. Search for the app that you have created earlier, in our case we created an app called “ISD-Notification” from the App Directory and click “Add” as shown in the below image.
5. Now your application is Integrated with Slack Channel as shown in the below image and you will get notifications in the selected channels.
We have completed configuring Slack, now we will have to configure Spinnaker in order for this setup to work. We will configure the echo component of Spinnaker.
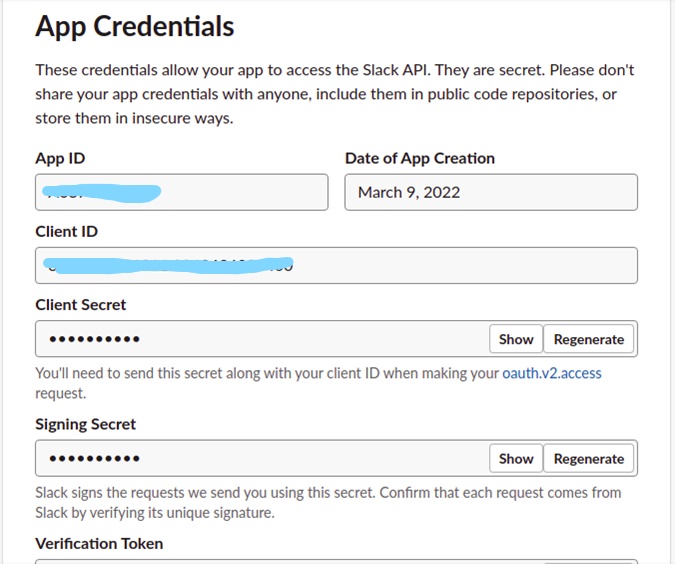
1. We will go to our slack app again by using this link: https://api.slack.com/apps. Click On “Basic Information” for your app and scroll down to see the “App Credentials”. The App Credentials window displays all the required credentials as shown below.
Note: Make sure that you have selected the correct application name
Note: These credentials allow your app to access the Slack API. They are secret. Please don’t share your app credentials with anyone, include them in public code repositories, or store them in insecure ways.
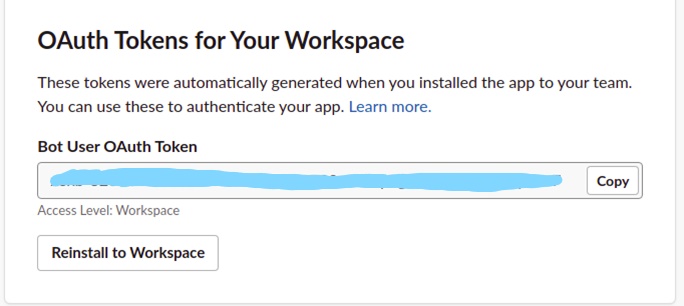
2. Click “OAuth & Permissions” copy bot token from the “Bot User OAuth Token” box. (Note: Bot token will get generated when you install your app in the slack workspace).
4. Update the /home/spinnaker/.hal/config file with following details. You can see the token details from the above image and paste it here.
slack:
enabled: true
token: “xoxb-****************-****************”
botName: “<your app name>”
Update the /home/spinnaker/.hal/default/profiles/echo-local.yml file with the following details. Update your “Token and Signing_secret” details from the “Bot User OAuth Token & App Credentials”
slack:
app:
token: “xoxb-**********-***********-*******************”
signing_secret: “********************”
You have to do a “hal deploy apply” once these changes are edited.
We will get to our Spinnaker now and configure SlackOps notification. We can select any pipeline we want to deploy using a manual judgment stage. Once we add the “Manual Judgement” stage to our pipeline we will configure the same.
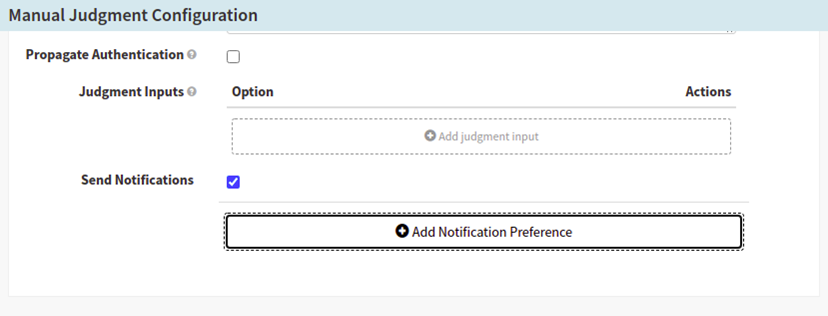
1. Select the “Send Notifications” option and Click “Add Notification Preference” in your pipeline manual judgement stage.
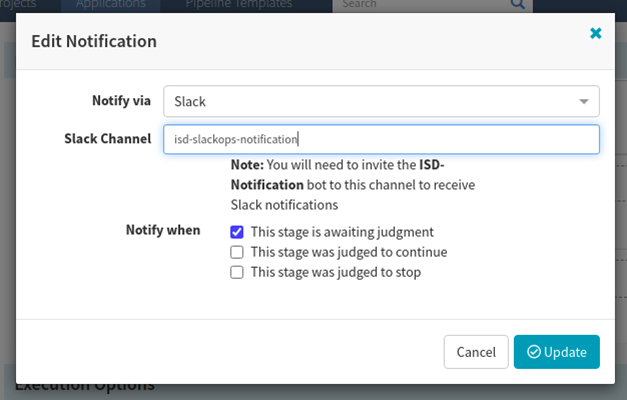
2. Select Notify via “Slack” from drop-down and provide your Slack Channel name. The application must be integrated with Slack, and notifications will be sent to that channel.
3. Select the options when the notification should execute and click Update as below shown in the above image.
4. When a user triggers a pipeline, they will receive a Slack notification asking them to approve or reject a particular stage, as shown below:
The pipeline will proceed to the next stage or be rejected in a specific stage based on the response as “Approve/Reject.”
Future possibilities
Adding this custom stage to enable approvals on Slack creates a foundation that opens the door for lots of other cool use cases. As per requirement, detailed and exhaustive information could be fetched from the pipelines and infrastructure. You could get information about your pipelines and infrastructure. Or start/cancel a pipeline. Etc., etc. All from the comfort of your Slack client!. The limit is your imagination. Reach out to us if you would like to make your slack app and spinnaker pipeline more productive.


0 Comments