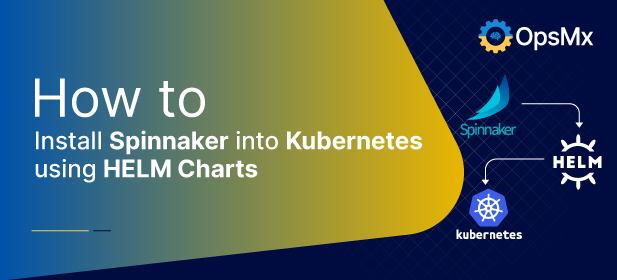
Spinnaker is an open-source continuous delivery platform used to deploy applications into Kubernetes, cloud (AWS/GCP/Azure) and VMs. With businesses adopting more microservices architecture for scale, they are looking for solutions to streamline their CI/CD process. Spinnaker is often considered to automate the software delivery process using pipelines.
In this article, we will discuss how to install and implement OSS Spinnaker using HELM Charts. One can use MySQL or Cloud storage and Redis is used for state storage.
Brief intro to Helm charts
(In case you are new to HELM)
Helm is the package manager that uses charts or collections of files that describe a related set of Kubernetes resources. Deployment with HELM brings a lot of conveniences, as anyone can easily deploy a HELM map into Kubernetes clusters.
Helm charts details for Spinnaker installation
This chart will provision a fully functional Spinnaker installation that can deploy and manage applications in the cluster it is deployed to. We have used Redis and Minio as the storage for Spinnaker state.
Prerequisites
- Kubernetes cluster 1.20 or higher with at least 4 cores and 16 GB memory.
- Helm 3 should be set up on the client system with version 3.10.3 or later.
Spinnaker Chart supports two modes of Installations
- Non-Gitops Method: This is the normal mode of Spinnaker Halyard, where all the configuration is inside Halyard.
- Gitops Method: The Spinnaker configuration is stored in a git-repo, and the halyard syncs with the repo. While it involves an extra setup, during changes/upgrades, we can see exactly what is changing as all changes, including spinnaker configuration can be routed via git-PRs.
Mode 1: Installing Spinnaker with Non-Gitops Method
- Add spinnaker helm repo to your local machine
helm repo add spinnaker https://opsmx.github.io/spinnaker-helm/
Note: If spinnaker helm repo is already added, do a repo update before installing the chart
helm repo update
- Use below command to create the namespace
kubectl create namespace opsmx-oss
- Use below command to install the helm chart using Non-Gitops Method:
helm install oss-spin spinnaker/spinnaker -n opsmx-oss --timeout 600s
Wait for 5-10 min and check the status of the pods by using the below command
kubectl -n oss-spin get pods
					NAME                                READY   STATUS      RESTARTS   AGE
spin-clouddriver-749d9c9589-wg49j   1/1     Running     0          11m
spin-deck-775cdfccff-shzcb          1/1     Running     0          11m
spin-echo-5fd76b8f79-fkdm9          1/1     Running     0          11m
spin-front50-597b4ff46d-72kxr       1/1     Running     0          11m
spin-gate-7dc88df658-xl8nm          1/1     Running     0          11m
spin-igor-67b9b4c66-zs28q           1/1     Running     0          11m
spin-orca-7d5958f8d6-c6w7x          1/1     Running     0          11m
spin-rosco-67847b657b-gx5vc         1/1     Running     0          11m
spinnaker-install-using-hal-mdt4q   0/1     Completed   0          14m
spinnaker-minio-5c994565d6-fjdkm    1/1     Running     0          14m
spinnaker-redis-master-0            1/1     Running     0          14m
spinnaker-spinnaker-halyard-0       1/1     Running     0          14m
**Tip**: For more information of changing the default values file please [check](charts/spinnaker/additionalinfo.md)
Accessing Spinnaker after installation
- Check the status of the pods by executing this command:
kubectl -n opsmx-oss get pods
- Once all pods show “Running” or “Completed” status and Use port-forward command to access the Spinnaker:
kubectl -n opsmx-oss port-forward svc/spin-deck 9000
Now, open your browser and navigate to http://localhost:9000. Alternatively, you can route traffic via Ingress/LB to the spin-deck and spin-gate services. We will discuss both the option down below.
Setting up Ingress to allow traffic to Spinnaker spin services
1. You can install the NGINX Ingress controller in the kubernetes cluster and map the wildcard DNS to the ingress controller. Refer to the ingress yaml file below.
					apiVersion: networking.k8s.io/v1
kind: Ingress
metadata:
  annotations:
    ingress.kubernetes.io/ssl-redirect: "true"
    kubernetes.io/ingress.class: nginx
    kubernetes.io/tls-acme: "true"
  labels:
    chart: spinnaker-2.2.14
  name: spinnaker-deck
spec:
  rules:
  - host: spinnaker.DNS.COM
    http:
      paths:
      - backend:
          service:
            name: spin-deck
            port:
              number: 9000
        path: /
        pathType: ImplementationSpecific
2. If you want to access Spinnaker with https, make sure cert-manager is installed in the Kubernetes cluster. You need to create an issuer and need to add the following annotations and tls section in the ingress file.
Annotations:
					annotations:
  acme.cert-manager.io/http01-edit-in-place: "true"
  cert-manager.io/issue-temporary-certificate: "true"
  cert-manager.io/issuer: ISSUER
TLS Section:
					  tls:
  - hosts:
    - isd.demoserver.opsmx.net
    secretName: oes-ui-ingress
After adding the ingress file looks as below:
					apiVersion: networking.k8s.io/v1
kind: Ingress
metadata:
  annotations:
    ingress.kubernetes.io/ssl-redirect: "true"
    kubernetes.io/ingress.class: nginx
    acme.cert-manager.io/http01-edit-in-place: "true"
    cert-manager.io/issue-temporary-certificate: "true"
    cert-manager.io/issuer: ISSUER
    kubernetes.io/tls-acme: "true"
  labels:
    chart: spinnaker-2.2.14
  name: spinnaker-deck
spec:
  rules:
  - host: spinnaker.DNS.COM
    http:
      paths:
      - backend:
          service:
            name: spin-deck
            port:
              number: 9000
        path: /
        pathType: ImplementationSpecific
  tls:
  - hosts:
    - spinnaker.DNS.COM
    secretName: deck-ingress
In case you want to use load balancer to access the Spinnaker service then please refer the section below:
Setting up Load balancer in the cluster to allow traffic to Spinnaker spin services
You can, however , access the Spinnaker service using ClusterIP, but that is not recommended. We will use a load balancer instead. All you need to do is open the spin-deck service yaml and change the type to LoadBalancer. And then a new IP will be assigned to the service spin-deck which can be used to access Spinnaker from the browser.
Run below command to update the type in spin-deck service to LoadBalancer.
kubectl -n oss-spin patch svc spin-deck -p '{"spec": {"type": "LoadBalancer"}}'
Once you have the EXTERNAL-IP address, you can connect to Spinnaker using the value of the EXTERNAL-IP. For example, using the below command we get the output as:
kubectl get service spin-deck-ui
					NAME          TYPE         CLUSTER-IP    EXTERNAL-IP   PORT(S)      AGE
spin-deck-ui LoadBalancer 172.30.16.45 52.147.219.48 9000:31544/TCP  12m
http://52.147.219.48:9000
Now we will see how to install Spinnaker with HELM charts using the GitOps method.
Mode 2: Installing Spinnaker with HELM charts using GitOps method
In this method all the halyard configuration will be centralised in the Git Repository. One needs to create an empty repo (called “gitops-halyard”) branch “main” as default, and clone to the local-machine. You need to clone the following repo: https://github.com/OpsMx/standard-gitops-halyard.git. Use the following command:
git clone https://github.com/OpsMx/standard-gitops-halyard.git
You can copy contents of the standard-gitops-halyard repo to the gitops-halyard repo.
cp -r standard-gitops-halyard/* gitops-halyard # Replace "gitops-halyard" with your repo-name
Change the directory to the newly created repo.
cd gitops-halyard
git add -A; git commit -m"Upgrade related changes";git push
You need to create a K8s secret called opsmx-gitops-auth (Do not change the name of the secret). Copy the below file and update the gituser, gittoken, and gitcloneparam (this includes username, token, organisation and git-repository) values. After that you can format of the secret: opsmx-gitops-auth’s yaml file.
					apiVersion: v1
kind: Secret
metadata:
  name: opsmx-gitops-auth
stringData:
  gitcloneparam: https://GIT_USERNAME:GIT_TOKEN@github.com/GIT_ORGANISATON/GIT_REPOSITORY.git
  gittoken: xxxxxxxxxxxx
  gituser: git-username
type: Opaque
After updating the secret values(username, token, organisation and git-repository) looks as below
					apiVersion: v1
kind: Secret
metadata:
  name: opsmx-gitops-auth
stringData:
  gitcloneparam: https://jhon:ghbzceqed_adsfasdf@github.com/john/gitops-halyard.git
  gittoken: ghbzceqed_adsfasdf
  gituser: jhon
type: Opaque
You can use the below command to apply the secrets yaml.
kubectl -n opsmx-oss apply -f secret.yaml
Once you apply the secret, upgrade OSS to gitops method using the below command.
helm install oss-spin spinnaker/spinnaker --set halyard.gitops.enabled=true --timeout 600s -n opsmx-oss
**Note**: Make sure the same release name is used during installation.
Securing Secret Credentials in the Halyard Git repo (Optional)
**Note**: Secrets in Halyard are plain-text, storing them as-is in Git repository is a security concern. We can replace all the Secrets/passwords in halyard config with a placeholder before committing them to the Git repository. During the halyard pod startup, these secrets are evaluated to their original value through an init container.
Create one or more K8s secrets in the same namespace where Spinnaker is running, with your credentials.
kubectl -n opsmx-oss create secret generic <SecretName> --from-literal=<SecretKey>=<SecretValue> --from-file=myk8saccount-kube.config
#File name becomes SecretKey
Or, Use below yaml file (hal-secrets.yml) to create the secret
					apiVersion: v1
kind: Secret
metadata:
  name: hal-secrets
stringData:
  prodjenkinspwd: jenkinspassword
  gitopstoken: gittoken
  myk8saccount-kube.config: <kubeconfig-content>
type: Opaque
kubectl -n opsmx-oss apply -f hal-secrets.yml
- Edit the hal config file (e.g: gitops-halyard/config) and update every password/confidential text as per the format here. For passwords, the placeholder is
encrypted:<K8s-SecretName>:<SecretKey>
For kubeconfig and other confidential files, the placeholder is
encryptedFile:<K8s-SecretName>:<SecretKey>
**Note**: The K8s-SecretName and SecretKey should be matching the secret created.
- A sample of the Hal config – before GitOps and after GitOps
- Before GitOps – Sample:
					github:
  enabled: true
  accounts:
  - name: githubdemo_account
    username: "GITUSERNAME"
    token: "5cb4371fxxxxxxxxx5"
- After GitOps – Sample:
					github:
  enabled: true
  accounts:
  - name: githubdemo_account
    username: "john"
    token: "encrypted:hal-secrets:gitopstoken"
**Note**: After creating the secrets and updating the hal config file, you are now ready to commit the files to your remote git repository. Go ahead and complete it. Any changes you make in Halyard should be manually committed to Git repository; otherwise with every Halyard restart the changes will be gone and git repo content is the source of the truth for Gitops Halyard repo.
Support
Limited support is available on Spinnaker Slack (spinnakerteam.slack.com).
Channel: opsmx
Hope this blog was useful to install OSS Spinnaker. If you want to learn more about configuration or making your software delivery secure then talk to one of our CI/CD experts.
About OpsMx
Founded with the vision of “delivering software without human intervention,” OpsMx enables customers to transform and automate their software delivery processes. OpsMx builds on open-source Spinnaker and Argo with services and software that helps DevOps teams SHIP BETTER SOFTWARE FASTER.


0 Comments