
Here in this blog, we will walk you through the steps to use Helm Charts to install Spinnaker on a local Kubernetes cluster (installed using Minikube). Before getting started with installation steps we take a quick look at what each of these applications is:
- Spinnaker is an open-source, multi-cloud continuous delivery platform for releasing software changes with high velocity and confidence.
- Helm is a tool that streamlines installing and managing Kubernetes applications. Helm Charts help you define, install, and upgrade even the most complex Kubernetes application.
- Kubernetes (k8s) is an open-source container orchestration system for automating computer application deployment, scaling, and management.
- Minikube provides a way to install and run Kubernetes locally. Minikube runs a single-node Kubernetes cluster inside a VM on your laptop for users looking to try out Kubernetes or develop with it day-to-day.
- Kubectl is the Kubernetes command-line tool that allows you to run commands against Kubernetes clusters. You can use kubectl to deploy applications, inspect and manage cluster resources, and view logs.
Prerequisites of installing Spinnaker on Kubernetes
Before installing Spinnaker on Minikube using Helm we need to ensure the following:
- Minikube is cluster ready and kubectl can connect to that cluster
- Helm 3.2.4 is installed
Install Kubectl
We need the latest version of Kubectl to manage the Kubernetes cluster.
To install kubectl, run the following commands.
					sudo apt-get update && sudo apt-get install -y apt-transport-https gnupg2 curl
curl -s https://packages.cloud.google.com/apt/doc/apt-key.gpg | sudo apt-key add -
echo "deb https://apt.kubernetes.io/ kubernetes-xenial main" | sudo tee -a /etc/apt/sources.list.d/kubernetes.list
sudo apt-get update
sudo apt-get install -y kubectl
Install Minikube
To install Minikube, run the following commands.
					curl -LO https://storage.googleapis.com/minikube/releases/latest/minikube_latest_amd64.deb
sudo dpkg -i minikube_latest_amd64.deb
Start the Minikube Cluster
Take into consideration that Spinnaker is composed out of multiple microservices, so you’ll need to allocate sufficient memory and CPU to run it locally.
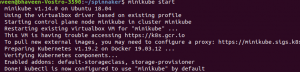
- To start the Minikube cluster, run the following command.
minikube start
Once it is started we will be able to see the following information.
- If you need to stop the Minikube cluster, run the following command.
minikube stop
- To check the Minikube cluster status, run the following command.
minikube status
Install Helm on Kubernetes
Before installing the Spinnaker, we need to set up Helm on Kubernetes.
Download the latest release of Helm binary and move it to the bin folder.
- Install helm from the URL link as given below.
https://get.helm.sh/helm-v3.2.4-linux-amd64.tar.gz
- Uncompress the tar file using Untar command as given below.
					tar -xf helm-v3.2.4-linux-amd64.tar.gz
    mv linux-amd64/helm /usr/local/bin/helm
- To check the helm version run the following command.
helm version
Deploy Spinnaker into Kubernetes using Helm
With Minikube and Helm installed and running, now we can install Spinnaker. Since it is available as a Helm Chart, we will get this done through a couple of steps.
Before we deploy Spinnaker, we need a configuration file in YAML format, which will provide the initial set of configuration values.
- To get this file from the Github Spinnaker Helm Chart repository run the following command.
					wget https://raw.githubusercontent.com/helm/charts/master/stable/spinnaker/values.yaml
      helm repo add stable https://kubernetes-charts.storage.googleapis.com/
- Change the Spinnaker Version and tag values in values.yaml file as given below.
					vi values.yaml
      halyard:
       spinnaker Version: 1.21.2
        image:
          repository: gcr.io/spinnaker-marketplace/halyard
          tag: 1.38.0
- Install Spinnaker using the following command.
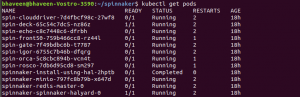
helm install spinnaker stable/spinnaker -f values.yaml kubectl get pods
- All the spinnaker components should be in running state as given below:

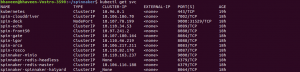
- Once all the spinnaker components are running, get the kubectl service.
run kubectl get svc
- Edit the svc of the spin-deck to access the Spinnaker UI.
kubectl edit svc spin-deck
- Change the service value from ClusterIP to NordPort as given below:
					spec:
      clusterIP: 10.107.78.199
      externalTrafficPolicy: Cluster
      ports:
      - nodePort: 31529
        port: 9000
        protocol: TCP
        targetPort: 9000
      selector:
       app: spin
    cluster: spin-deck
     sessionAffinity: None
     type: NordPort
     status:
     loadBalancer: {}
- For accessing the spinnaker, run the following command.
					minikube IP
      bhaveen@bhaveen-Vostro-3590:~/spinnaker$ minikube IP
      192.168.99.100
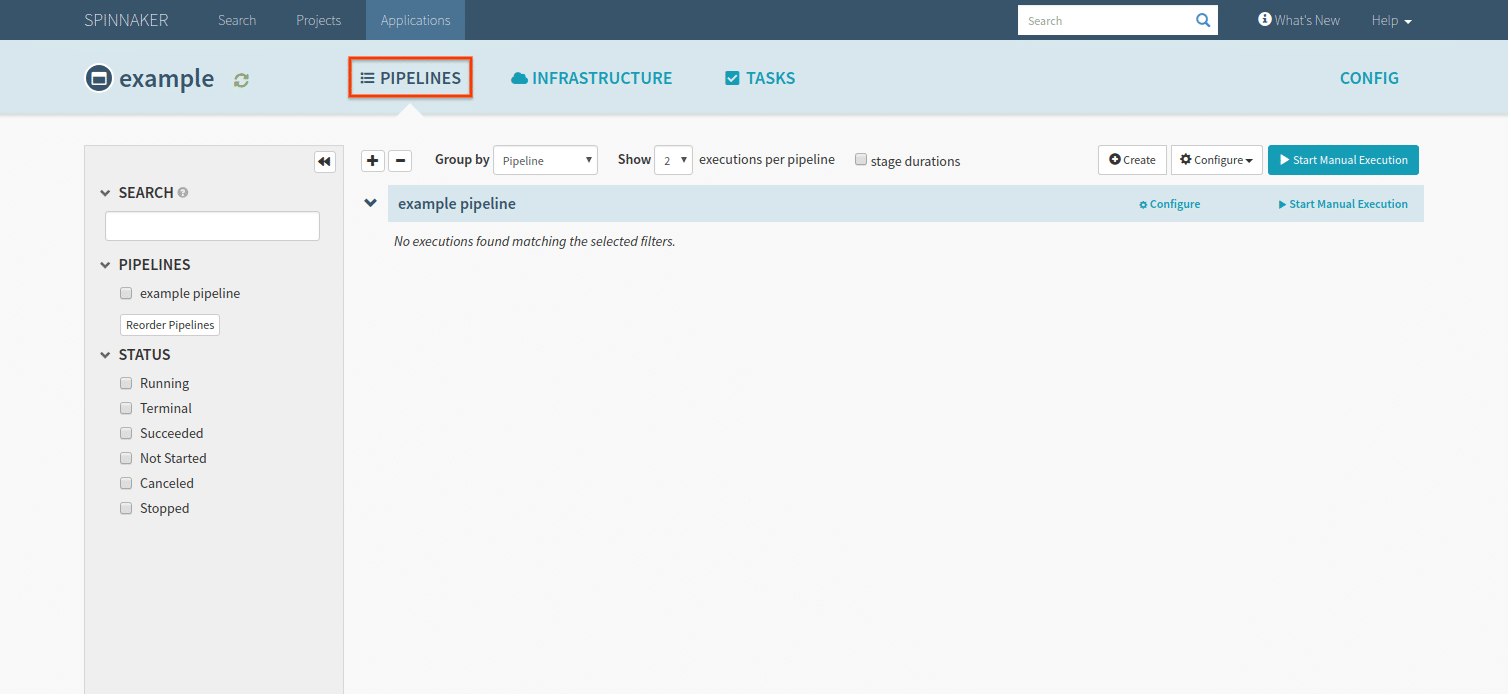
- Spinnaker can now be accessed from the browser by visiting
192.168.99.100:31529 (spin-deck node ip)
About OpsMx
Founded with the vision of “delivering software without human intervention,” OpsMx enables customers to transform and automate their software delivery processes. OpsMx builds on open-source Spinnaker and Argo with services and software that helps DevOps teams SHIP BETTER SOFTWARE FASTER.
0 Comments