
Spinnaker is an open-source multi-cloud Continuous Delivery (CD) platform. It is used for building and releasing software changes with high velocity and confidence. Spinnaker takes out the manual and hands-off activities by automating the processes in CD. It supports deployments to multi-cloud environments like AWS, Azure, GCP, Cloud Foundry, Kubernetes, etc. It is easily extensible. Spinnaker also allows you to control the resources that got deployed during CD and view their current status. You can edit these resources from within the Spinnaker UI, scale up or scale down, and rollback when needed. Spinnaker helps organizations to :
- manage their application deployments in a multi-cloud environment,
- provides a single pane of control and visibility,
- enforces enterprise policies.
Spinnaker Architecture
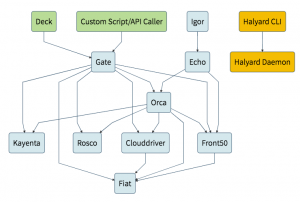
Spinnaker has a microservice-based architecture. The major components are:
- Deck (UI to access Spinnaker)
- Gate (Manages API calls)
- Orca (Orchestration Engine responsible for pipeline and other operations)
- Clouddriver (Responsible to make calls to different providers e.g. AWS, Azure, Google)
- Front50 (Hold metadata of applications, pipelines, projects, and notifications)
- Rosco (Responsible for produce immutable VM images)
- Igor (Responsible to trigger pipeline)
- Echo (Responsible for Event triggers, send notifications to Slack, email, and so on).
- Fiat (Responsible for authorization in Spinnaker).
- Kayenta (Responsible for Canary Analysis)
- Halyard (Responsible for managing all Spinnaker services and configuration using CLI. Using this, we can update, rollback, and so on)
Spinnaker Objects
Storage Providers
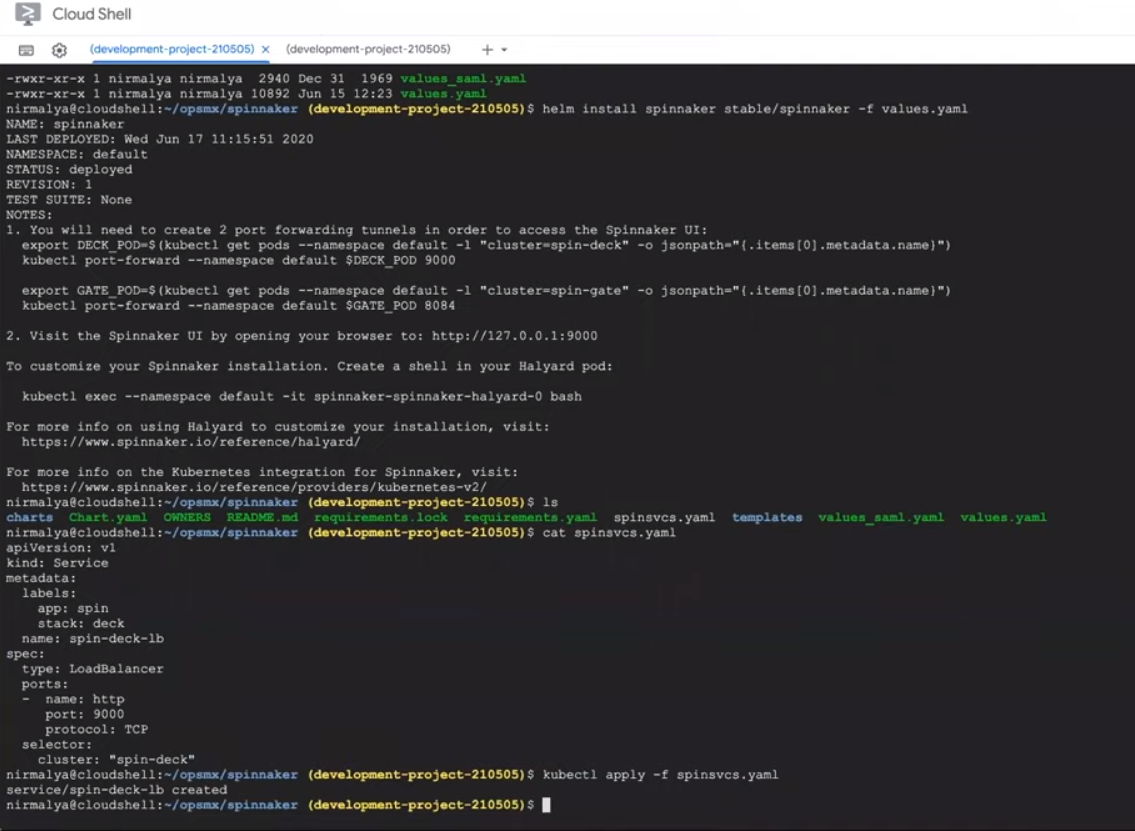
Storage providers allow you to store all your configuration and pipeline information like Google Cloud, AWS S3, Azure, Minio, Redis, MySql, and so on. Spinnaker uses Redis or MySql to store run-time performance data. You can later analyze the information and perform an audit. The storage objects are configured in values.yaml before installing the Spinnaker. You can even change them later in the halyard.
Cloud Providers
Cloud providers like Google Cloud, AWS, Azure, Kubernetes, Cloud Foundry, Oracle Cloud, etc., provide connectivity to cloud infrastructures, and Spinnaker has built-in support for multi-cloud deployments. You can use halyard for configuring them by running the command:

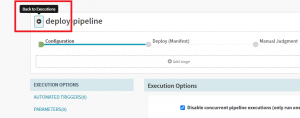
For the second stage, we will select the ‘Type’ as “Manual Judgement” that waits for you to review the results and the pipeline is aborted if you disapprove. You can set up the configuration for this stage in the form and save it. As this stage depends on the “Deploy (Manifest)” stage ensure that the same is selected in the “Depends On” form field.

Manual Judgment
Also, set the Execution options as “ If a stage fails – halt the entire pipeline”. This will immediately halt the execution of all running stages and fail the entire execution.

Execution Options
You can add more stages and set them to run concurrently or selectively depending on the results of the previous stage executions. So depending on the manual judgment we can either set further stages as “Delete (Manifest)” or deploy to test and so on. The entire pipeline that is set up is visually represented at the top section of the pipeline configuration screen.

Entire Pipeline
Spinnaker gives you the flexibility to easily move any of the stages across the pipeline and run them serially or parallelly.
Execute Pipeline
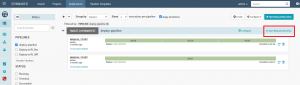
Click the “Back to Executions” icon to go back to the pipelines page.
Back to Executions
Click the “Start Manual Execution” link to trigger the pipeline execution manually.
Start Pipeline execution manually
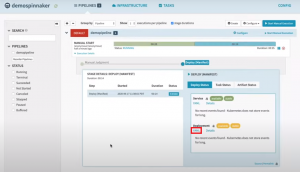
As the pipeline execution starts a progress bar shows the execution status. Clicking on the progress bar reveals the pipeline details and you can monitor the progress. After the “Manual Judgement” stage is executed the pipeline waits for manual approval of the next stage of the pipeline to be continued or stopped.
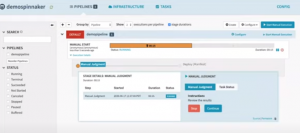
Pipeline execution status
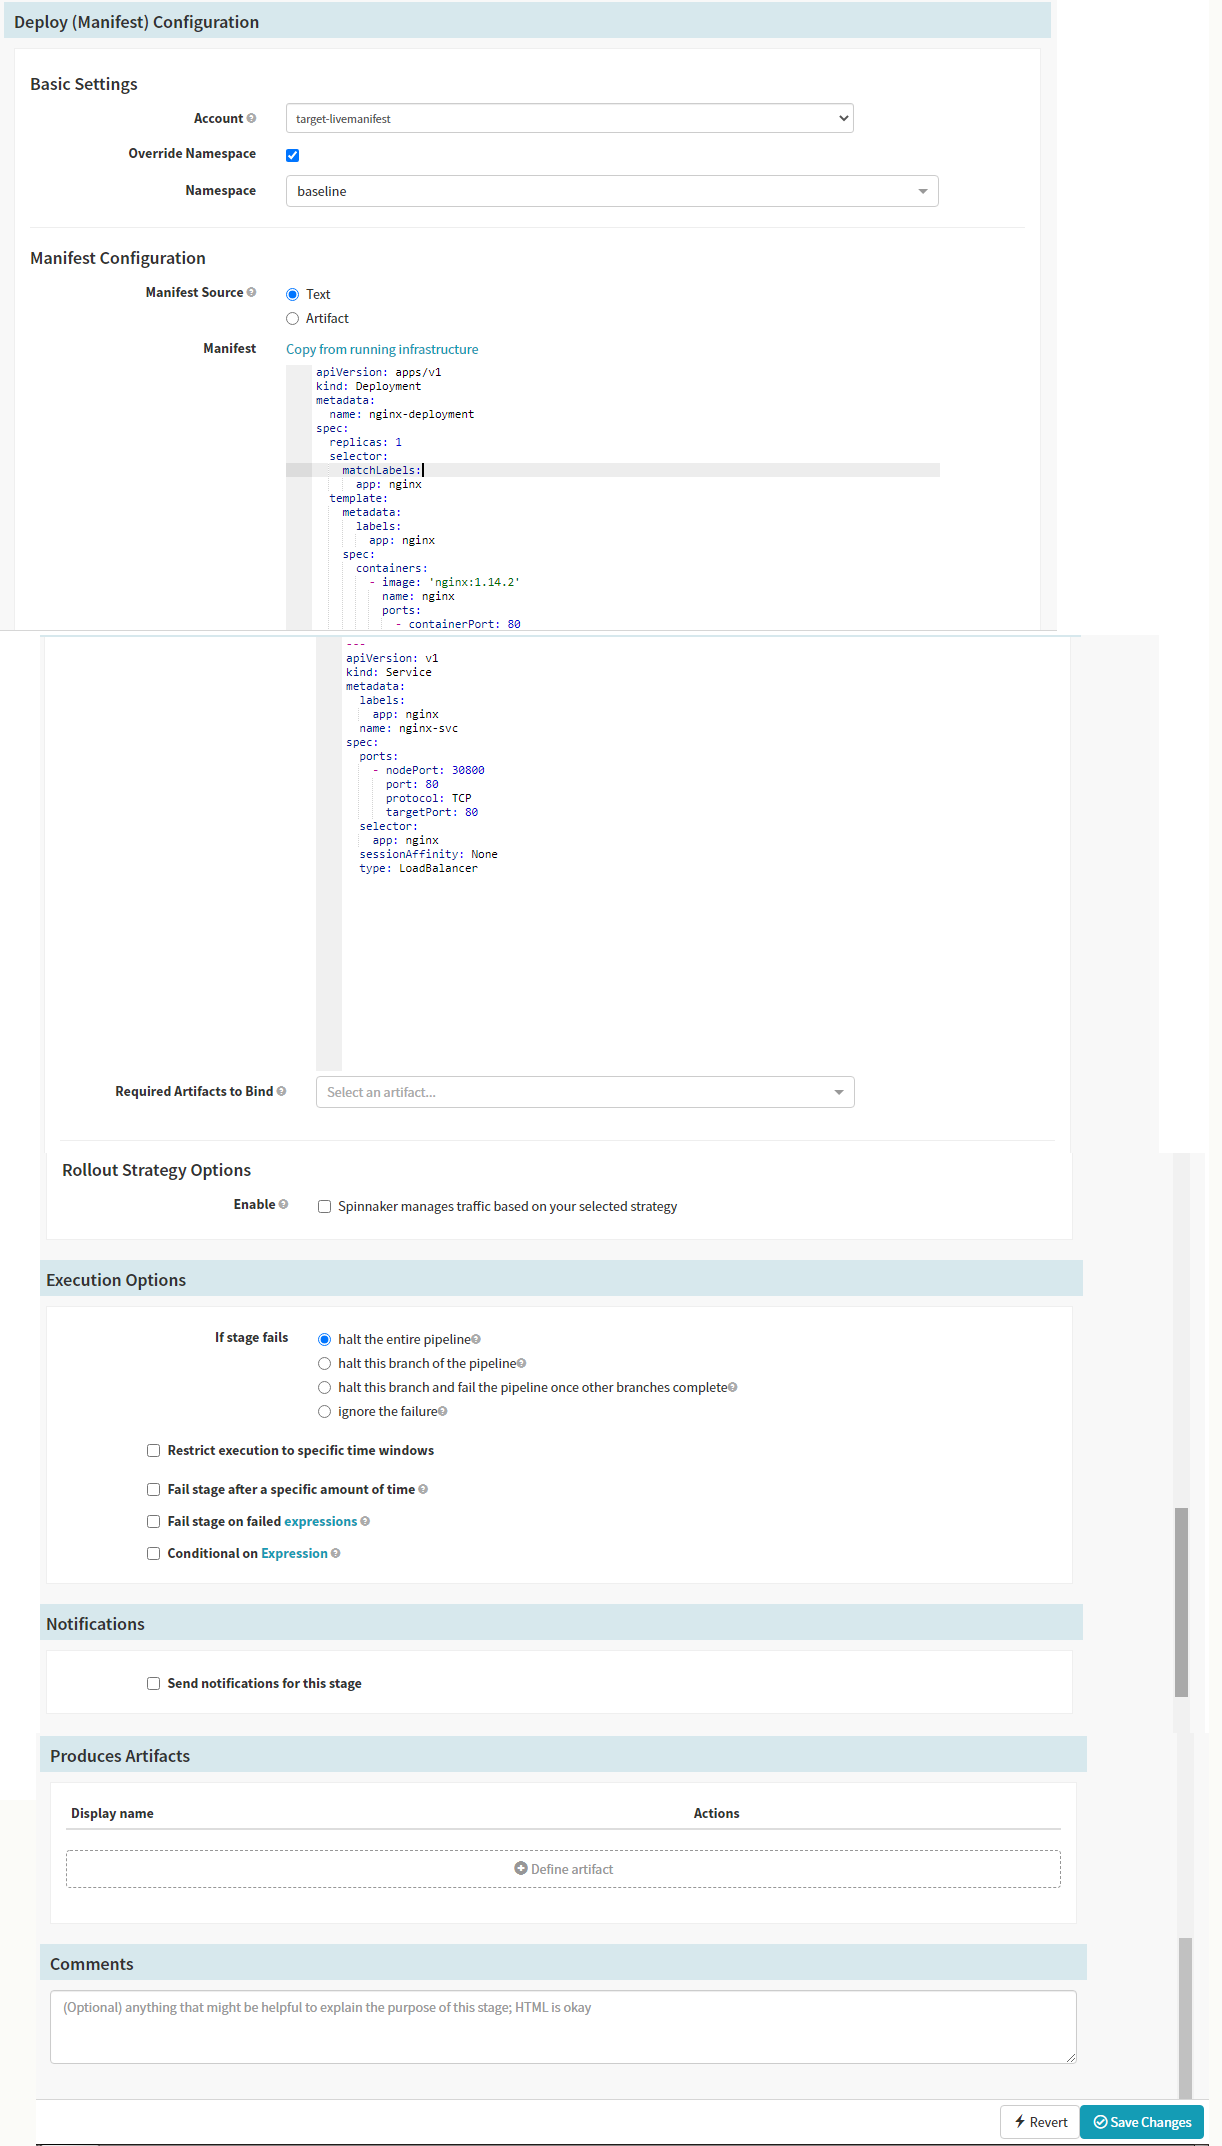
You can also see the yaml of the service that is being deployed by clicking the yaml link in the details of the deployment status.
Check YAML
The yaml details are displayed on a screen that pops up. You will find that Spinnaker adds a lot of metadata to the deployment manifest that allows it to manage the deployment like scale up the resources or rollback the deployment.
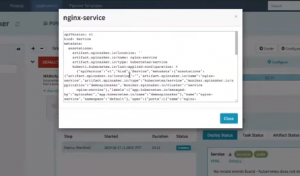
YAML details
You can also check the task status which is a list of activities during deployment.
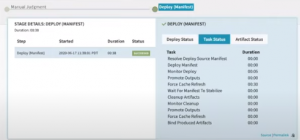
Task Status
After the deployment is done you can go and check the “Infrastructure” section to see the deployment results. You will see the Nginx server with a single service pod has been deployed. By clicking the “Logs: Console Output” link you can see the output of the pod without needing to kubectl. When you have a pod that is not healthy, instead of giving your end-users/developers direct access to your staging or prod environments you can let them check the logs to find out what went wrong.
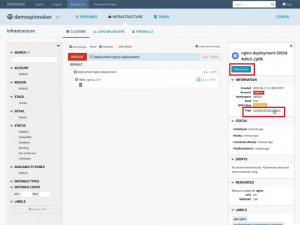
Deployment results -Infrastructure
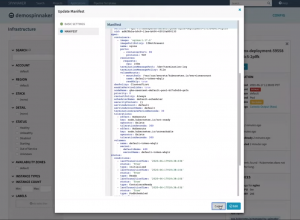
By clicking the “Pod Actions” button you can take action on the Pod like edit and update the manifest or even delete the pod.
Edit pod
Depending on the load you can scale up or scale down your resources by adding/removing one or more nodes/pods. To do this go to the deployment, click “Deployment Actions” and select ‘Scale’.
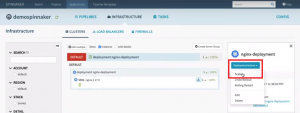
Deployment actions – Scale
You can set the number of replica pods on the screen that pops up, provide an account name, and submit.
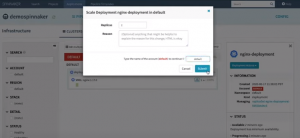
Set the number of replica pods
You can check the ‘LoadBalancer’ service by clicking on the service icon in the pod.
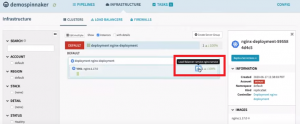
Check Service
It shows you the internal IP and ingress URL to access the Nginx service.
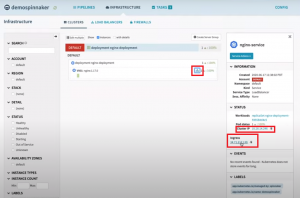
Access Service
Clicking on this ingress URL opens up the deployed NGINX server UI in your browser.

Nginx UI
You can also read about How Spinnaker can be used to deploy into AWS ECR. Or if you want a detailed demonstration, you can click here.
Spinnaker Features
Multi-Cloud deployments
Spinnaker not only allows you to have visibility but also have control over the resources of your deployments. The above example shows deployment to the Kubernetes environment. Similarly, you can deploy to other cloud environments like AWS, Azure, GCP, and so on. So from the same Spinnaker UI, you can deploy and control resources in multiple accounts.
Pipeline-as-code
Spinnaker defines its pipeline-as-code. The whole pipeline is stored and managed as a JSON file. So you can maintain them in a code repository like GitHub and load them from there. A Spinnaker pipeline can be used as a master to update other Spinnaker pipelines. They can be synced so that whenever there’s an update to Git repo, the pipelines get updated.
Spinnaker also allows you to create and maintain pipeline templates to use them to create new pipelines easily. Whenever a pipeline template is updated, all the pipelines that inherit them get updated too. So if you add a new stage (say security scan stage), the inherited pipelines will have this stage added too. It is an excellent way to enforce uniformity across different pipelines.
Security features in Spinnaker
Spinnaker has in-built support for security that makes it suitable for enterprises where security is a prime concern. The following security features can be easily enabled:
- SSL/TLS – The Spinnaker UI and API end-points can be SSL/TLS enabled which secrets it against external network requests. Communication between the different Spinnaker microservice can also use TLS authentication. To invoke security for the Spinnaker UI run the following command in halyard:
0 Comments