
Why use argocd-vault plugin?
Storing sensitive information in Git is not a security best practice. The DevOps team tries to ensure tight secret management to avoid security compromises. Managing secrets should also be practiced while using ArgoCD for GitOps.
Argo CD provides integration with the Hashicorp Vault to implement secret management in the GitOps process. As Vault stores and secures tokens, passwords, certificates, and API Keys, the Ops team can use the integration for deployments, configmaps, and other Kubernetes CRDs. In this article, we will see the step to integrate Argo CD and Vault to ensure more secure GitOps practices in production.
Fore more you can read: https://github.com/argoproj-labs/argocd-vault-plugin
Prerequisites for implementing Argo-Vault integration
1. ArgoCD installed
2. Vault installed with appropriate app role
a)Refer to the below link for Vault installation:- https://www.vaultproject.io/docs/platform/k8s/helm/run
b)Vault configuration with application role: https://www.vaultproject.io/docs/auth/approle
3. ClusterRoleBinding with repo-server service account (Argo with Helm installation, no need to add service account or ClusterRoleBinding)
How to ensure ClusterRoleBinding
ClusterRoleBinding is an RBAC object that can have a list of subjects such as users, groups, or service accounts to grant cluster-wide permissions.
Add permission to resources in ClusterRole of argocd-server and the below section.
kubectl edit clusterrole -argocd-server
					- apiGroups:
  - '*'
  resources:
  - '*'
  verbs:
  - '*'
- nonResourceURLs:
  - '*'
  verbs:
  - '*'
Add your repo-server service account to ClusterRoleBinding of argocd-server in order to get secret over cluster level
kubectl edit clusterrolebinding <releasename>-argocd-server
					- kind: ServiceAccount
  name: <releasename>-argocd-repo-server
  namespace: <argocdinstalled namespace>
Steps to integrate Vault and Argo CD
Assuming you have installed Argo CD using install.yaml, you can proceed with the following steps to configure the integration between Vault and Argo.
Step-1: Configure Vault plugin
We will first set up our Vault by creating an application and sensitive information. Please follow the below points to progress with the Vault plugin.
(Note: Argo with Helm installation no need to add any configuration)
1. Add the Vault plugin to Argocd by editing configmap in the file argocd-cm
# kubectl edit cm argocd-cm -n <namespace>
					  configManagementPlugins: |-
    - name: argocd-vault-plugin
      generate:
        command: ["argocd-vault-plugin"]
        args: ["generate", "-s", "NAMESPACE:argocd-vault-plugin-credentials", "./"]
(Note: If it is other than argocd namespace add namespace in front of secret)
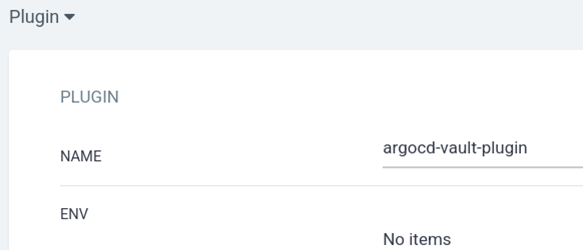
2. Once all changes are applied in argocd-repo-server deployment, the Vault plugin will be visible in the Argo CD UI- in the plugin section of the application.
3. Now we will authenticate Argocd to Vault using a secret . At first we will create a secret called argocd-vault-plugin-credentials
kubectl apply -f argocd-vault.yaml -n <argocd-namespace>
Below is the Secret file for reference:
					apiVersion: v1
stringData:
  AVP_AUTH_TYPE: approle
  AVP_ROLE_ID: <ROLE-ID>
  AVP_SECRET_ID: <SECRET-ID>
  AVP_TYPE: vault
  VAULT_ADDR: <VAULT-ADDRESS>
kind: Secret
metadata:
  name: argocd-vault-plugin-credentials
type: Opaque
(Note: Update ROLE_ID, SECRET_ID,VAULT_ADDR with appropriate details.)
4. Enable the Vault plugin for Argocd using volume mount strategy for argocd-repo-server deployment
kubectl edit deploy argocd-repo-server -n <argocd-namespace>
- Add envsecretref in the deployment for the main container after the env section.
Optional
					envFrom:
  - secretRef:
      name: argocd-vault-plugin-credentials
- Add volume mount to the main container
					  volumeMounts:
        - mountPath: /usr/local/bin/argocd-vault-plugin
          name: custom-tools
          subPath: argocd-vault-plugin
- Add another init container to the argocd-repo-server deployment with volume mount
					     initContainers:
      - args:
        - |-
          wget -O argocd-vault-plugin https://github.com/argoproj-labs/argocd-vault-plugin/releases/download/v1.13.0/argocd-vault-plugin_1.13.0_linux_amd64
          chmod +x argocd-vault-plugin && mv argocd-vault-plugin /custom-tools/
        command:
        - sh
        - -c
        image: alpine:3.8
        imagePullPolicy: IfNotPresent
        name: download-tools
        resources: {}
        terminationMessagePath: /dev/termination-log
        terminationMessagePolicy: File
        volumeMounts:
        - mountPath: /custom-tools
          name: custom-tools
- Add empty dir to the volumes
					 volumes:
      - emptyDir: {}
        name: custom-tools
5. Verify the vault plugin in argocd-repo-server
# kubectl exec -it argocd-repo-server-<pod> -n argocd — bash
You can now run the below command to verify the newly created plugin.
argocd@argocd-repo-server-7f:~$ argocd-vault-plugin version
argocd-vault-plugin v1.12.0 (9c7288a5b2d395fea19c1100f2cd07b547cc1ee2) BuildDate: 2022-07-08T13:27:45Z
In this case we have successfully built the plugin.
Create a Vault secret from the application
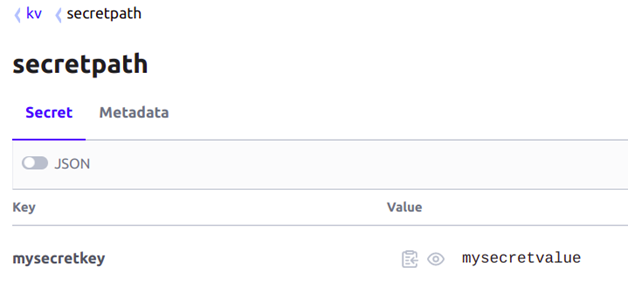
1. I have configured some secrets in the Vault that I will use in the Secret YAML file. ( You can refer to the secret yaml file I have used here)
					apiVersion: v1
kind: Secret
metadata:
  name: example-secret
  annotations:
    avp.kubernetes.io/path: "kv/data/secretpath" #path of secret in vault
type: Opaque
stringData:
  sample-secret: <mysecretkey> #Fomat should be like this with key
2. Create an application in the argocd with repo and the plugin info can be added for the sample repo.
					apiVersion: argoproj.io/v1alpha1
kind: Application
metadata:
 name: vault-secret
spec:
 destination:
   name: ''
   namespace: NAMESPACE
   server: 'https://kubernetes.default.svc'
 source:
   path: vault-secret-source
   repoURL: 'git@github.com:OpsMx/argo-sample-apps.git'
   targetRevision: HEAD
   plugin:
     name: argocd-vault-plugin
 project: default
 syncPolicy:
   automated: null
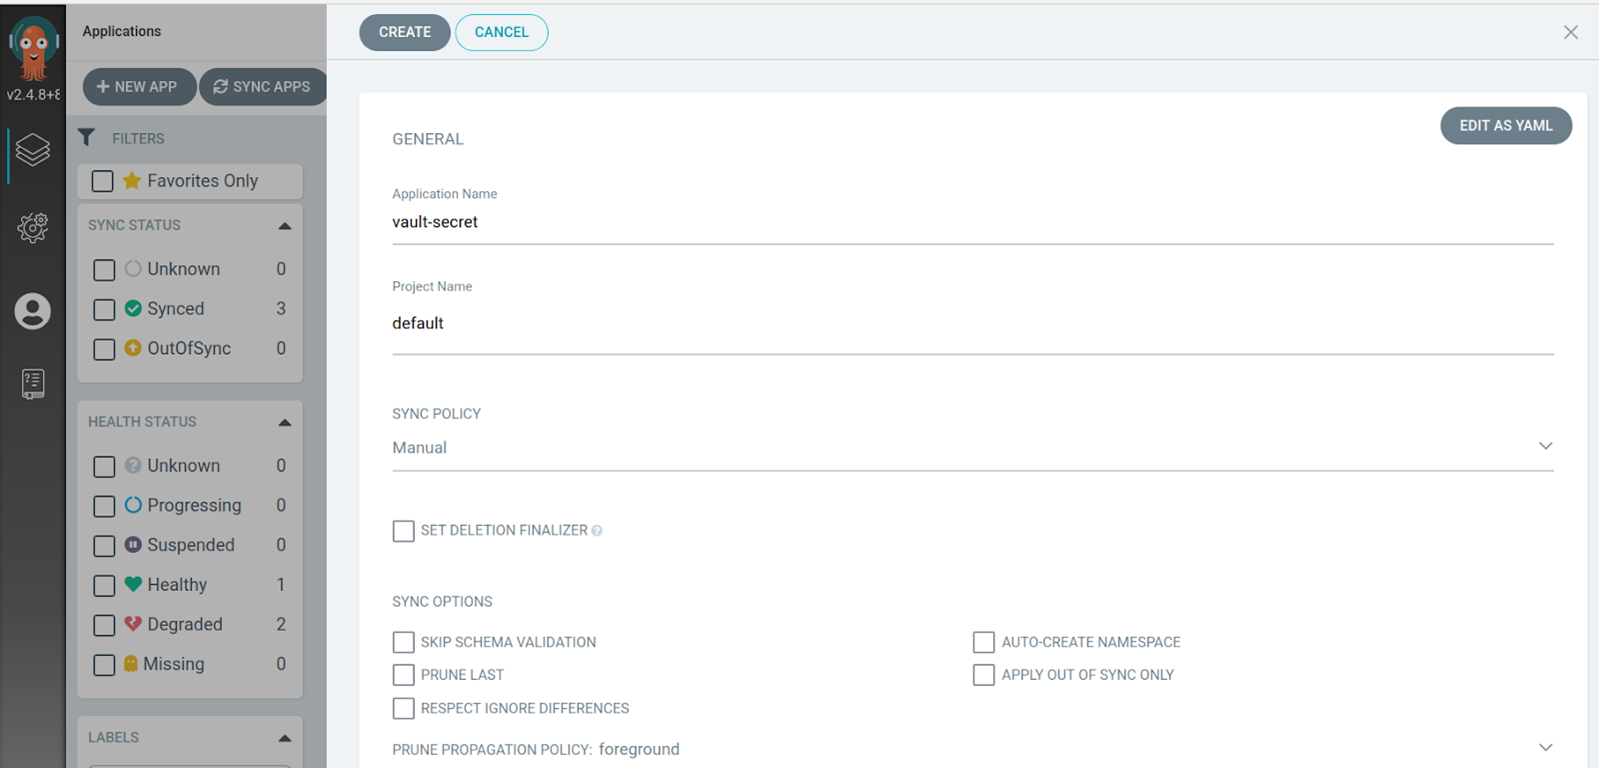
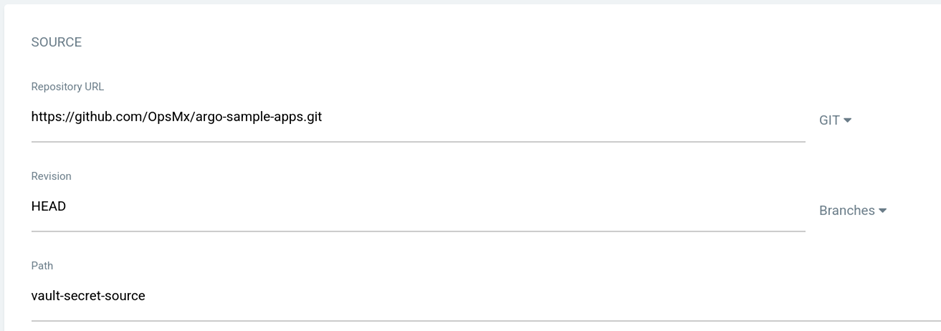
3. Application is created as below
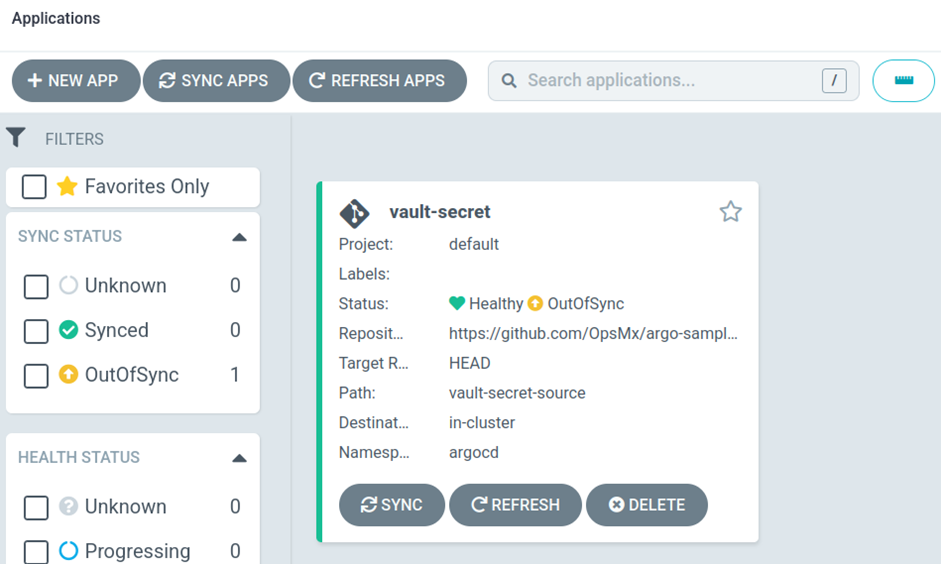
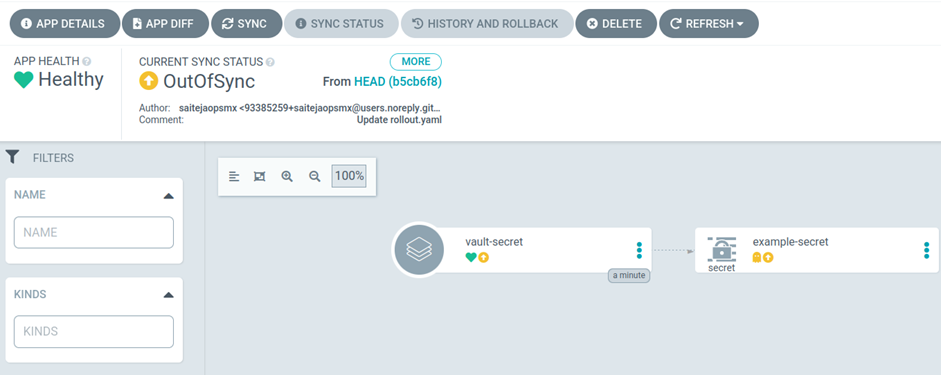
4. Sync the application to deploy the manifest

5. The secret is created in the backend
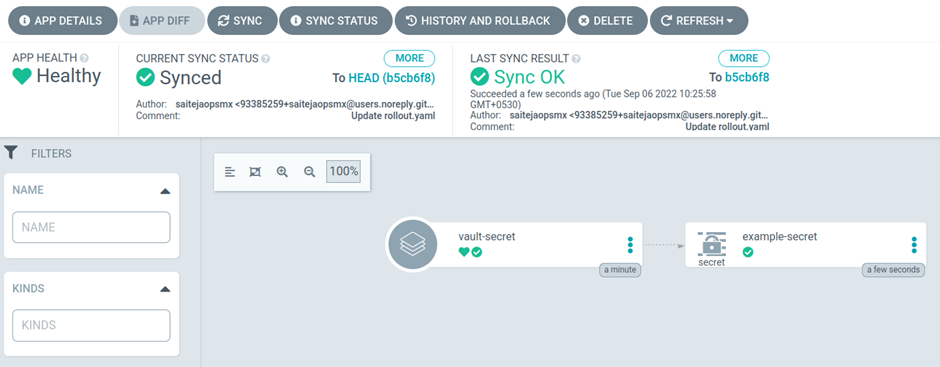
6. You can check the secret in the cluster using the following command.
kubectl get secret example-secret -n argocd -o jsonpath='{.data.sample-secret}' | base64 -d
It print my secret value as mentioned in vault
Mysecretvalue-v5
Integrating Argo CD and Vault With HELM:
Integrating Argo and Valut using HELM is pretty straightforward. Enable secret management in the global section in the values.yaml and specify the roleid, credentials(secretid) and vaultaddress and perform helm install.
					 secretmanagement:
    vault: true
    roleid: a301e-XXX-XXX-5327
    secretid: 13XXXX-25aedb1648a2
    vaultaddress: <vault address>
Once the Installation is done, Please edit the configmap of argocd-cm and replace Release.Namespace with namespace where Argocd is installed.
Next Step
Secret management is essential for the Kubernetes ecosystem in any enterprise. Developers can configure their secrets in Vault without worrying about the information getting hacked or stolen.
Let us know in the comments if the blog was helpful. And in case of any doubts about configuring Argo CD for production, you can reach us at the Argo Center of Excellence. Or if you want to resolve any open vulnerabilities while adopting Argo, please reach out to 24*7 support for Argo.
About OpsMx
Founded with the vision of “delivering software without human intervention,” OpsMx enables customers to transform and automate their software delivery processes. OpsMx builds on open-source Spinnaker and Argo with services and software that helps DevOps teams SHIP BETTER SOFTWARE FASTER.
0 Comments