
In the series-1 blog, we have seen how to install Kubernetes single-node cluster for POC, primarily to check the compatibility between the Kubernetes version in your organization and the Spinnaker version you are going to use. This is a series-2 blog where we will see how to install the Spinnaker for the POC in an isolated environment (say in a local system).
Disclaimer: This setup is not to be used in the dev/prod environment under any circumstances.
Let us get started.
Quick pointers before we get started:
- Spinnaker follows a modular architecture. It has almost 12 microservices (read this). Hence Spinnaker deployment into Kubernetes will follow distributed mode.
- We will deploy all the microservices of Spinnaker into the same Kubernetes cluster. And the Kubernetes cluster will be our target cloud provider.
Prerequisite for setting up Spinnaker
- Experimental Kubernetes cluster
- Kubectl binary and kubeconfig file to access Kubernetes cluster
- Save MinIO deployment yaml and halyard deployment yaml file below.
MinIO deployment yaml file:
					apiVersion: apps/v1
kind: Deployment
metadata:
  name: MinIO-deployment
  labels:
    app: MinIO
spec:
  strategy:
    type: Recreate
  selector:
    matchLabels:
      app: MinIO
  template:
    metadata:
      labels:
        app: MinIO
    spec:
      containers:
      - name: MinIO
        image: docker.io/MinIO/MinIO:latest
        args:
        - server
        - /storage
        env:
        - name: MinIO_ACCESS_KEY
          value: "testingtest"
        - name: MinIO_SECRET_KEY
          value: "testingtest"
        ports:
        - containerPort: 9000
---
apiVersion: v1
kind: Service
metadata:
  name: MinIO-service
spec:
  ports:
    - port: 9000
      targetPort: 9000
      protocol: TCP
  selector:
    app: MinIO
  type: ClusterIP
Halyard deployment yaml file.
					apiVersion: apps/v1
kind: Deployment
metadata:
  name: spin-halyard
  labels:
    app: spin
    stack: halyard
spec:
  replicas: 1
  selector:
    matchLabels:
      app: spin
      stack: halyard
  template:
    metadata:
      labels:
        app: spin
        stack: halyard
    spec:
      containers:
      - name: halyard-daemon
        image: gcr.io/spinnaker-marketplace/halyard:stable
        imagePullPolicy: Always

        readinessProbe:
          exec:
            command:
            - wget
            - -q
            - --spider
            - http://localhost:8064/health
        ports:
        - containerPort: 8064
---
apiVersion: v1
kind: Service
metadata:
  name: spin-halyard
spec:
  ports:
    - port: 8064
      targetPort: 8064
      protocol: TCP
  selector:
    app: spin
    stack: halyard
  type: ClusterIP
---
Steps to deploy Spinnaker into K8S cluster
Step1: Import halyard and MinIO deployment yaml files
After setting up the Kubernetes cluster environment, you have to import/create attached halyard deployment yaml and MinIO deployment yaml .
Confirm kubeconfig file is in ~/.kube folder as config, this will be used to access kubernetes cluster:
# cd ~/.kube

Once the deployment yaml files mentioned above are downloaded/created follow the below steps:
# kubectl create namespace <namespace>
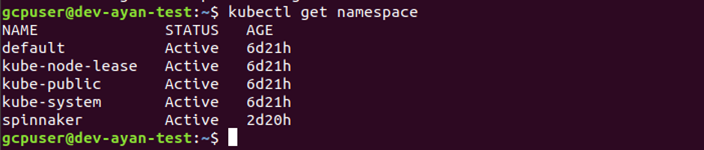
In the below screenshot we have used the command to create a namespace called ‘spinnaker’, and then verified that the namespace is created by using:
# kubectl get namespace
Next you can set our config context in the Kubernetes namespace
To check our current-context, we can use the below command:
# kubectl config current-context
We will see something like below screen

Next we will set this as our current context using below command:
# kubectl config set-context $(kubectl config current-context) -namespace=<namespace>
We will apply the MinIO and halyard deployment that we have provided ( mentioned in the start of the blog), both the yaml files have to be imported to your environment and then applied.
					# kubectl apply -f MinIO-deployment.yml
# kubectl apply -f halyard-deployment.yml
When you apply both the yaml files you will see a screen like below:

To confirm the deployment of MinIO and halyard yaml file, we can check the same, using the command below:
# kubectl get deploy

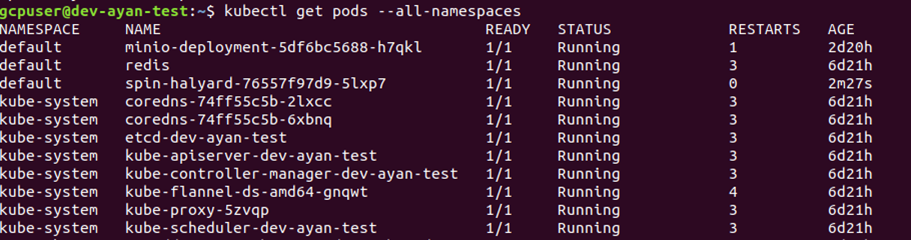
You can confirm and check the pods for the above deployment using the below command:
# kubectl get pods -all-namespaces
Step-2 : Make Kubernetes cluster our target cloud provider by copying the config file into the cluster
Next we will copy kubeconfig file to halyard pod to make the Kubernetes cluster as our target cloud provider, to do so we will use the below command:
# kubectl cp ~/.kube/config <some-namespace>/<some-pod>:/tmp/kubeconfig
For example if we have a namespace say ‘spinnaker’ and a halyard pod named ‘spin-halyard-76557f97d9-5lxp7’, the command will look like below:
					# kubectl exec -it <halyard-pod> /bin/bash -n <namespace>
# cd /tmp

Step-3: Configuring Spinnaker services using ‘hal’ commands provided by halyard service
To configure Spinnaker services we will log in to halyard pod, using command below:
# kubectl exec -it <halyard-pod> /bin/bash
For my halyard pod, I have used the following name:
# kubectl exec -it spin-halyard-76557f97d9-5lxp7 /bin/bash
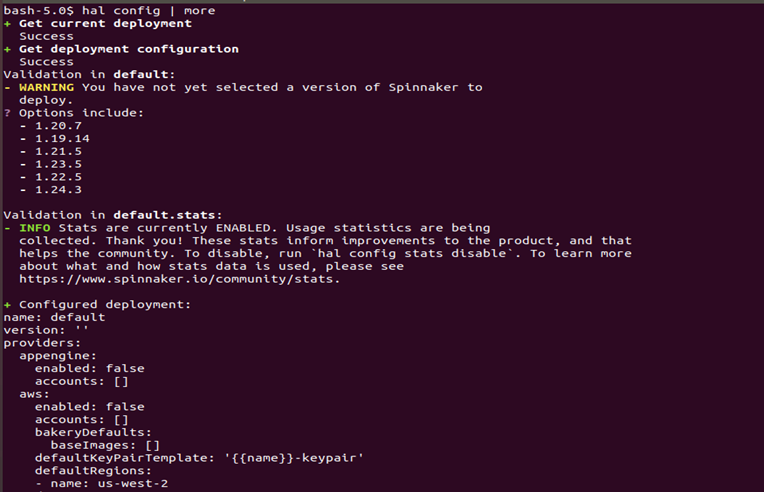
Then we will check our configuration by running the command below:
# hal config | more
On running the command, you will see a screen like below, which will highlight all the available versions of Spinnaker for deployment:
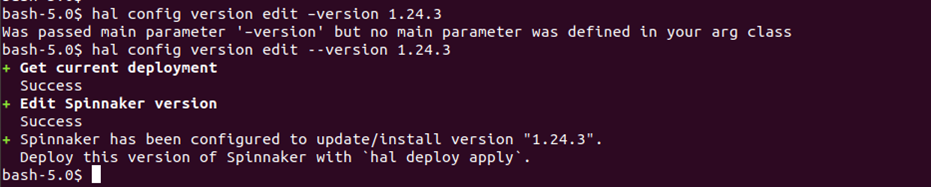
We will execute below hal commands to select the version of Spinnaker that we will like to use:
# hal config version edit --version <spinnaker-version>
In this case, I am choosing to deploy a stable Spinnaker version 1.24.3
# hal config version edit --version 1.24.3
Step-4: Edit the Spinnaker storage details in MinIO
MinIO is a persistent storage solution, this helps to store application settings and pipelines that we will configure in Spinnaker. We are using this because we don’t want to depend on any cloud provider for storing Spinnaker data.
Let us start with the configuration.
# hal config storage s3 edit --endpoint http://MinIO-service:9000 --access-key-id testingtest --secret-access-key -bucket lftestbucket
We will be prompted for secret-access-key, and we will provide “testingtest”, I have mentioned this detail in my MinIO-deployment.yml. Also, the bucket name is specified as “lftestbucket”- basically, this is the name of a storage bucket that the specified Spinnaker account has access to. Note, if the bucket name is not specified explicitly, a random name will be chosen. If you specify a globally unique bucket name that doesn’t exist yet, Halyard will create that bucket for you.
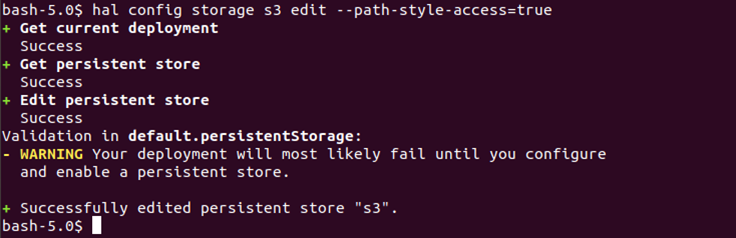
# hal config storage s3 edit -path-style-access=true
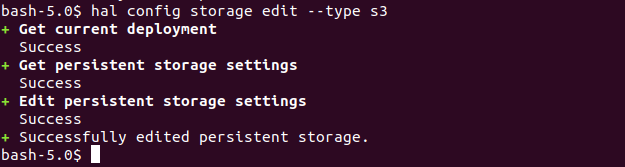
# hal config storage edit --type s3
When we will use the above command to enable s3 compatible storage, we will see an output like the below screenshot. There will be warnings related to deployment failure but they will be corrected once the storage is edited.
MinIO doesn’t support versioning objects, we need to disable it in Spinnaker by running the below command:
# mkdir -p ~/.hal/default/profiles && echo "spinnaker.s3.versioning: false" > ~/.hal/default/profiles/front50-local.yml
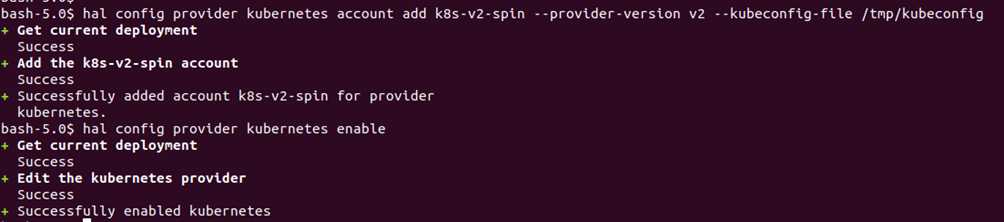
We will now configure the target cloud provider, i.e Kubernetes, and enable the same in the next two steps:
# hal config provider kubernetes account add k8s-v2-spin --provider-version v2 --kubeconfig-file /tmp/kubeconfig
# hal config provider kubernetes enable
We will configure the mode of Spinnaker deployment using the below command:
# hal config deploy edit --type Distributed --account-name k8s-v2-spin -location <namespace where you would like to deploy>

For eg: hal config deploy edit –type Distributed –account-name k8s-v2-spin –location spinnaker
Here ‘spinnaker’ is the namespace I had created earlier by using the command:
# kubectl create namespace spinnaker
You can then kickstart Spinnaker services by running the below command
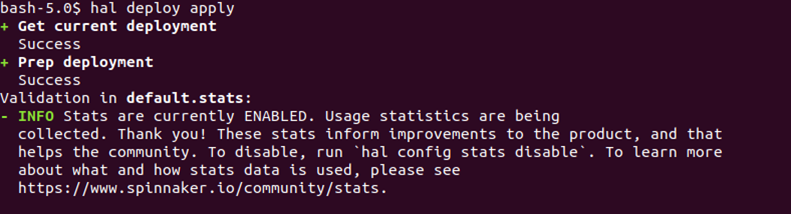
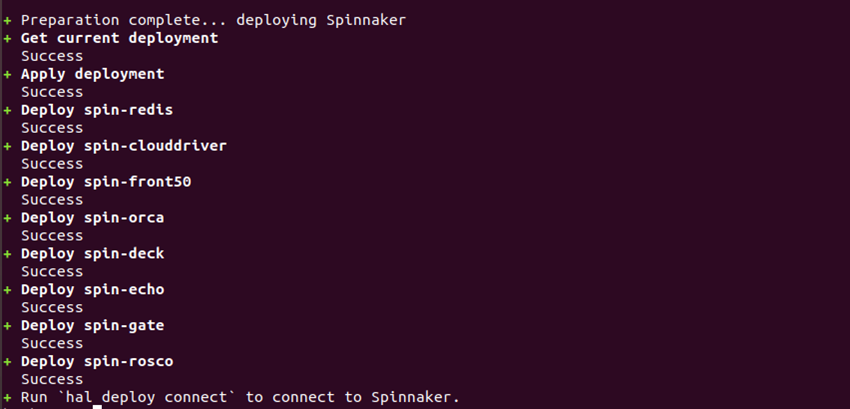
# hal deploy apply
You should see the status of the deployment like the below.
Now, we will exit out of the halyard pod.
You can verify if the Spinnaker service is running by executing the following command:
# kubectl get pods -n <namespace>
You will notice that the pods wrt to various Spinnaker services will be showing up. Note, It might take some time for all pods to be in a running state.
Finally, you can expose the deck (microservice of Spinnaker UI) and gate (microservice of Spinnaker API) endpoints locally to access Spinnaker from browser:
# kubectl port-forward spin-deck 9000:9000
# kubectl port-forward spin-gate 8084:8084
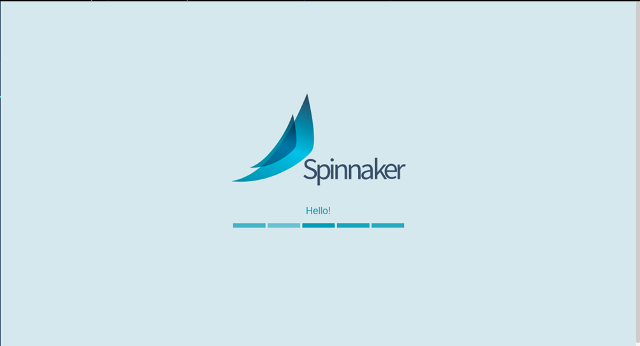
Now you can check Spinnaker UI on browser:
http://localhost:9000
Few Items to Remember:
Using the above step, everytime we close the terminal we will not have access to our Spinnaker, so to access Spinnaker whenever we are using the port-forward commands the terminal should be up and running. We would have to do this everytime we start our system after shutdown.
As mentioned at the beginning of the blog, this setup is to be used in your local system, even though it is limited to its usage, it is still one of the good ways to start getting your hands dirty with Spinnaker.
Just in case you want to cut the clutter and try production-grade Spinnaker from Day-1 operation, then explore OpsMx Intelligent Software Delivery (ISD) platform which is built on open-source Spinnaker.
OpsMx ISD comes with four modules:
1. AI-Driven Delivery Verifications:
To implement AI/ML and verify all software releases throughout the delivery pipeline including compliance to security and enterprise policies.
2. Continuous Security and Compliance:
To enable define organization-wide policies that are automatically enforced across all release workflows.
3. Visibility, Insights and Approvals
To ingest and analyze all CI/CD toolchain data from each workflow and continuously assess risk and make automated, informed approvals with full visibility for each release.
4. Audit and Software Supply Chain
To monitor and log all software delivery events including CI/CD toolchain data in real-time to enable supply chain traceability and security audits.
About OpsMx
Founded with the vision of “delivering software without human intervention,” OpsMx enables customers to transform and automate their software delivery processes. OpsMx builds on open-source Spinnaker and Argo with services and software that helps DevOps teams SHIP BETTER SOFTWARE FASTER.
0 Comments